The steps in order
Version shown: AshtangaYoga.info Yoga Cikitsa 1st Series sheet (Dr. Ronald Steiner, 2015)
| # | Step | Breath | Side | Hold | Cues and options |
|---|---|---|---|---|---|
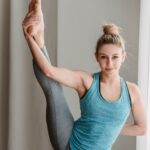
| 1 | Utthita Hasta Padangusthasana Utthita Hasta Pādāṅguṣṭhāsana | Free breathing | Each side | 5 breaths AshtangaYoga.info 1st Series sheet | Transition: From Samasthiti, hold the right big toe and extend the leg forward. Easier option: Bent knee; strap; hand on the knee. Includes Utthita Parsvasahita (leg to the side) on the AshtangaYoga.info sheet. |
| 2 | Ardha Baddha Padmottanasana Ardha Baddha Padmottānāsana | Free breathing | Each side | 5 breaths AshtangaYoga.info 1st Series sheet | Transition: Half lotus, bind the foot behind the back, fold. Easier option: Tree-pose foot position; no bind. Lotus-based: teacher guidance; never force the knee. |
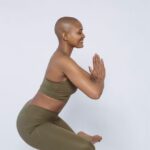
| 3 | Utkatasana Utkaṭāsana | Free breathing | 5 breaths AshtangaYoga.info 1st Series sheet | Transition: After a vinyasa, jump to the feet, bend the knees, arms up. Easier option: Hands on the hips. | |
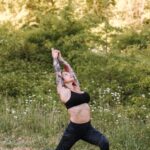
| 4 | Virabhadrasana A Vīrabhadrāsana I | Free breathing | Each side | 5 breaths AshtangaYoga.info 1st Series sheet | Transition: Step back to Warrior I, right then left. Easier option: Shorter stance. |
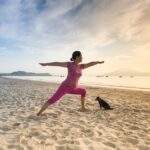
| 5 | Virabhadrasana B Vīrabhadrāsana II | Free breathing | Each side | 5 breaths AshtangaYoga.info 1st Series sheet | Transition: Open to Warrior II, left then right (following on from Warrior A). Easier option: Bend the knee less. |
| 6 | Dandasana Daṇḍāsana | Free breathing | 5 breaths AshtangaYoga.info 1st Series sheet | Transition: Vinyasa between postures/sides (jump back, chaturanga, upward dog, downward dog, jump through). Easier option: Sit on a folded blanket. | |
| 7 | Paschimottanasana A, B, C (D) Paścimottānāsana | Free breathing | 5 breaths each AshtangaYoga.info 1st Series sheet | Transition: Fold, changing the grip for each letter. Easier option: Bent knees; strap. AshtangaYoga.info lists A-D; other guides A-C. | |
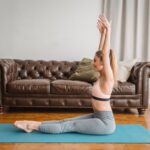
| 8 | Purvottanasana Pūrvottānāsana | Free breathing | 5 breaths AshtangaYoga.info 1st Series sheet | Transition: Hands behind, lift the hips, toes towards the floor. Easier option: Reverse tabletop. AshtangaYoga.info sheet: learning beyond this point continues once regular practice is established. | |
| 9 | Ardha Baddha Padma Paschimottanasana Ardha Baddha Padma Paścimottānāsana | Free breathing | Each side | 5 breaths AshtangaYoga.info 1st Series sheet | Transition: Vinyasa between postures/sides (jump back, chaturanga, upward dog, downward dog, jump through). Easier option: Foot on the inner thigh; no bind. Lotus-based: teacher guidance. |
| 10 | Triang Mukha Eka Pada Paschimottanasana Triaṅga Mukhaikapāda Paścimottānāsana | Free breathing | Each side | 5 breaths AshtangaYoga.info 1st Series sheet | Transition: Vinyasa between postures/sides (jump back, chaturanga, upward dog, downward dog, jump through). Easier option: Blanket under the straight-leg hip. |
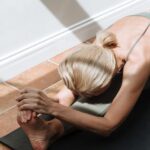
| 11 | Janu Sirsasana A, B, C Jānu Śīrṣāsana | Free breathing | Each side | 5 breaths each AshtangaYoga.info 1st Series sheet | Transition: Vinyasa between postures/sides (jump back, chaturanga, upward dog, downward dog, jump through). Easier option: Skip B and C with knee problems. C turns the toes under the knee: teacher guidance. |
| 12 | Marichyasana A, B Marīcyāsana A | Free breathing | Each side | 5 breaths each AshtangaYoga.info 1st Series sheet | Transition: Vinyasa between postures/sides (jump back, chaturanga, upward dog, downward dog, jump through). Easier option: Strap for the bind; B is lotus-based. |
| 13 | Marichyasana C, D Marīcyāsana C | Free breathing | Each side | 5 breaths each AshtangaYoga.info 1st Series sheet | Transition: Vinyasa between postures/sides (jump back, chaturanga, upward dog, downward dog, jump through). Easier option: Hug the knee instead of binding. D combines half lotus and a bound twist: teacher. |
| 14 | Navasana Paripūrṇa Nāvāsana | Free breathing | 5 breaths, 3-5 times with a lift between AshtangaYoga.info 1st Series sheet | Transition: Cross the legs and lift between rounds. Easier option: Hands behind the thighs; knees bent. | |
| 15 | Bhuja Pidasana Bhujapīḍāsana | Free breathing | 5 breaths AshtangaYoga.info 1st Series sheet | Transition: Jump the legs around the arms, cross the ankles, lower the head. Easier option: Feet stay on the floor. Arm balance: teacher. | |
| 16 | Kurmasana Kūrmāsana | Free breathing | 5 breaths AshtangaYoga.info 1st Series sheet | Transition: Arms under the knees, legs extended, chest towards the floor. Easier option: Bent knees. | |
| 17 | Supta Kurmasana Supta Kūrmāsana | Free breathing | 5 breaths AshtangaYoga.info 1st Series sheet | Transition: Bind the hands behind, cross the feet behind the head. Easier option: Stay in Kurmasana. Legs-behind-head shape: teacher only. | |
| 18 | Garbha Pindasana Garbha Piṇḍāsana | Free breathing | 9 rolls clockwise AshtangaYoga.info 1st Series sheet | Transition: Lotus, arms through the legs, roll in a circle. Easier option: Hug the knees and rock without lotus. Full lotus: teacher. | |
| 19 | Kukkutasana Kukkuṭāsana | Free breathing | 5 breaths AshtangaYoga.info 1st Series sheet | Transition: From the last roll, come up onto the hands in lotus. Easier option: Skip. Lotus arm balance: teacher. | |
| 20 | Baddha Konasana A, B (C) Baddha Koṇāsana | Free breathing | 5 breaths each AshtangaYoga.info 1st Series sheet | Transition: Vinyasa between postures/sides (jump back, chaturanga, upward dog, downward dog, jump through). Easier option: Sit on a blanket; blocks under the knees. AshtangaYoga.info lists A-C; other guides A and B. | |
| 21 | Upavishta Konasana A, B Upaviṣṭha Koṇāsana | Free breathing | 5 breaths each AshtangaYoga.info 1st Series sheet | Transition: Vinyasa between postures/sides (jump back, chaturanga, upward dog, downward dog, jump through). Easier option: Bent knees in B (balancing). | |
| 22 | Supta Konasana | Free breathing | 5 breaths AshtangaYoga.info 1st Series sheet | Transition: Lie back, legs over the head and wide, hold the big toes; roll up to balance and down. Easier option: Skip with neck problems. No separate pose record yet (related: plow pose). | |
| 23 | Supta Padangusthasana (and Supta Parsvasahita) Supta Pādāṅguṣṭhāsana | Free breathing | Each side | 5 breaths AshtangaYoga.info 1st Series sheet | Transition: Lying, hold the big toe, leg up, then to the side. Easier option: Strap. |
| 24 | Ubhaya Padangusthasana Ubhaya Pādāṅguṣṭhāsana | Free breathing | 5 breaths AshtangaYoga.info 1st Series sheet | Transition: Roll up to balance on the sitting bones, holding both big toes. Easier option: Bent knees. | |
| 25 | Urdhva Mukha Paschimottanasana Ūrdhva Mukha Paścimottānāsana | Free breathing | 5 breaths AshtangaYoga.info 1st Series sheet | Transition: Roll up holding the sides of the feet, legs to the face. Easier option: Bent knees. | |
| 26 | Setu Bandhasana (Ashtanga version) | Free breathing | 5 breaths AshtangaYoga.info 1st Series sheet | Transition: Lying, heels together and toes out, lift the hips and roll onto the crown of the head, arms crossed. Easier option: Skip with neck problems; do bridge pose instead. Different from bridge pose (weight on the head): teacher. | |
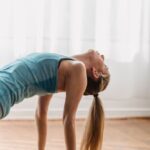
| 27 | Urdhva Dhanurasana Ūrdhva Dhanurāsana | Free breathing | 5 breaths, 3-5 times AshtangaYoga.info 1st Series sheet | Transition: Lying, hands by the ears, press up; lower with control between. Easier option: Bridge pose. Deep backbend: teacher. | |
| 28 | Paschimottanasana (closing) Paścimottānāsana | Free breathing | 5-10 breaths AshtangaYoga.info 1st Series sheet | Transition: Counterpose after the backbends; then the finishing sequence. Easier option: Bent knees. | |
| 29 | Finishing sequence sequence | Free breathing | per the finishing sequence AshtangaYoga.info finishing sheet | Transition: Vinyasa or Chakrasana (backward roll) to the shoulderstand. Easier option: Novices: lotus or cross-legged seat and rest only. |