Extended Hand-to-Big-Toe Pose (Utthita Hasta Padangusthasana): steps and the Ashtanga version

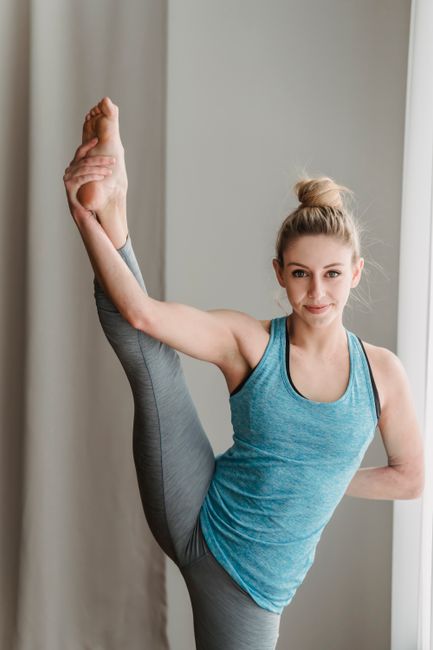
Extended hand-to-big-toe pose (Utthita Hasta Padangusthasana) is a one-leg balance holding the lifted foot. Steps, strap and chair options, the Ashtanga sequence and the revolved variation.

Not yet reviewed by a qualified teacher Names and shape checked against 5 sources

Extended Hand-to-Big-Toe Pose yoga pose
Sanskrit name
Utthita Hasta Pādāṅguṣṭhāsana उत्थित हस्त पादाङ्गुष्ठासन (source)
Also called
Standing Hand to Big Toe, Hand-to-Big-Toe Pose, Revolved Hand-to-Big-Toe Pose (section on this page)
Other spellings
Utthita Hasta Padangusthasana, Utthita Hasta Padangushthasana, Parivrtta Hasta Padangusthasana (section on this page)
Pose family
Balancing, Standing
Starting position
Standing
Movement
Balance
Taught in
Vinyasa Yoga: Flow, Breath and What to Expect, Hatha Yoga: The Historical Term and the Modern Class
Difficulty
Intermediate
Prerequisite skills
Steady tree pose; enough hamstring length to lift a straight leg to about hip height lying down (reclining hand-to-big-toe), or a strap.
Body areas
Core, Feet and ankles, Hamstrings, Hips, Legs
Props
Chair, Strap, Wall
Practised
Solo

Names in different traditions

TraditionName usedNote
Iyengar (Light on Yoga)Utthita Hasta PādāṅguṣṭhāsanaAsana 11, plates 20-23: staged, ending with the chin beyond the knee.
Ashtanga (AshtangaYoga.info, KPJAYI lineage count)Utthita Hasta Pādāṅguṣṭhāsana A and B, Utthita PārśvasahitaForward with fold, to the side, forward without hands; five breaths each.
Bihar School of YogaUtthita hasta padangusthasana (raised hand to big toe pose)Basic form plus two variations (both hands; leg to the side); up to 60 seconds.

Step by step

Coming into the pose

  1. Stand in mountain pose and shift your weight onto the left foot. Firm the left thigh without locking the knee.
  2. Bend the right knee toward the chest and hold the right big toe with the first two fingers and thumb of the right hand (or loop a strap around the foot). Left hand on the left hip.

In the pose

  1. Press the right foot forward and straighten the leg as far as the hamstrings allow, keeping the spine upright and the pelvis level.
  2. Draw the right hip down and in toward the standing leg. Fix your gaze on one point and breathe steadily.
  3. Optional side version: keep the leg lifted and slowly open it out to the right, only as far as the hip allows; turn the gaze to the left.

Coming out

  1. Bring the leg back to centre, bend the knee, release the toe and lower the foot. Stand in mountain pose, then repeat on the other side.

Breathing

Breathe evenly; use the exhale to root the standing foot and the inhale to lengthen the spine. Light on Yoga takes two breaths at each stage; the Ashtanga count holds each final position for five breaths.

Alignment cues

  • Standing leg firm, knee not hyperextended.
  • Pelvis level: the lifted-leg hip does not hitch up.
  • Standing hip draws toward the midline; buttock engaged.
  • Spine upright with its natural curve; bend the knee before the back rounds.
  • Press the foot into the hand or strap rather than pulling the leg in.

Common alignment errors

  • Forcing a straight leg and rounding the back.
  • Hitching the lifted hip up, which rotates the leg inward.
  • Sinking into the standing hip.
  • Locking the standing knee.

Modifications and easier variations

  • Keep the lifted knee bent and hold the knee with one or both hands. none

Advanced variations

  • Forward fold: hold the foot with both hands and bring the chin toward the shin (Light on Yoga stage 4; Ashtanga A).
  • Hands-free: hold the straight leg up in front with the hands on the hips (Ashtanga B).
  • Revolved hand-to-big-toe pose: opposite hand holds the foot, torso turns toward the lifted leg (section on this page).

Props and chair adaptations

  • Strap under the arch of the lifted foot, both ends in one hand. strap
  • Rest the lifted heel on the back of a chair (padded with a blanket) placed near a wall. chair
  • Seated on the front of a chair: extend one leg with the heel on the floor, fold from the hips and reach for the big toe. chair
  • Stand with your back to a wall for confidence. wall

Precautions

  • Do not force a straight leg; use a bent knee or strap to protect the hamstring attachment.
  • Hamstring injury, lower back pain, sciatica or a hip condition: keep the leg low or use the reclining version; ask your doctor or physical therapist.
  • Unreliable balance or pregnancy: support the lifted foot on a chair or stand by a wall.
  • Revolved variation: avoid with back or disc problems and in pregnancy.

Learn it with a teacher: The basic version with a strap can be learned from clear instructions. Learn the folded, hands-free and revolved versions with a teacher; in Ashtanga, follow your teacher on when the pose is added to your practice.

General information, not medical advice. Poses do not cure illness. If you are pregnant, injured or have a health condition, check with your doctor and tell your teacher before you practise.

In short: extended hand-to-big-toe pose is a standing balance in which you lift one leg forward, hold its big toe and extend the leg toward hip height or higher. It works balance and the backs of the legs. A strap, a bent knee or a chair makes it practical for most people; the folded and hands-free versions are for experienced practitioners.

This pose shows very quickly whether the standing leg is doing its job: the moment the lifted leg straightens, the pelvis wants to tip and the standing hip wants to drift out. Learning to hold both still is the real work. Below we explain the name, how different traditions build the pose, the cues behind the steps and the revolved variation.

The name and how traditions teach it

Utthita means extended, hasta hand and pādāṅguṣṭha big toe. In Light on Yoga (1966) the pose builds in stages: holding the big toe with the knee bent, stretching the leg forward, lifting it higher with both hands and finally resting the chin beyond the knee. Iyengar notes that the last stages cannot be balanced without first mastering the extended leg. The Bihar School’s Asana Pranayama Mudra Bandha describes a basic forward form, a two-handed version drawing the leg toward the head and a version with the leg out to the side, holding each for up to 60 seconds. Yoga Journal teaches the forward form and the side version for general classes.

In the Ashtanga standing sequence the pose is a fixed multi-part flow, as documented by AshtangaYoga.info: the leg goes forward and the torso folds over it; then the leg opens to the side (Utthita Pārśvasahita); then it returns to the front and is held up without the hands, hands on the hips, for five breaths. AshtangaYoga.info notes that Pattabhi Jois introduced the pose only after a student had learned the reclining version near the end of the Primary Series, which is a useful hint about its difficulty.

How to make it work

Root the standing foot and firm the standing thigh without pushing the knee back. Keep the natural curve of the lower back: if the hamstrings are tight, the pelvis tucks and the spine rounds as soon as the leg straightens, which is the cue to bend the knee or use a strap. Yoga Journal’s teaching tips are to keep the pelvis level, without hitching up the lifted-leg side, and to stop the standing hip sliding away from the midline by engaging the buttock. Press the lifted foot forward into the hand or strap rather than pulling the leg toward you.

Revolved hand-to-big-toe pose (Parivṛtta Hasta Pādāṅguṣṭhāsana)

In the revolved variation, the lifted leg is held in front by the opposite hand, and the torso turns toward the lifted leg while the free arm reaches back at shoulder height. The setup and grip are the same as the forward form, so it lives on this page. It adds a twist to an already demanding balance and is an advanced variation: the pelvis must stay level while the chest rotates, and tight hamstrings make that very hard. Learn it with a strap around the foot first, and only once the forward form is steady. We have not yet confirmed this variation in two of our reference sources, so treat the description as general guidance until it is checked.

Precautions in plain words

Do not force a straight leg: a bent knee or strap protects the hamstring attachment at the sitting bone. With a hamstring injury, lower back pain, sciatica or a hip condition, keep the leg low or practise the reclining version, and check with your doctor or physical therapist. If balance is unreliable, rest the lifted foot on a chair. In pregnancy, a wall or chair for support is advisable; ask your midwife or doctor. This page is general information, not individual advice.

Preparation and next poses

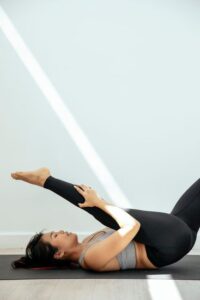
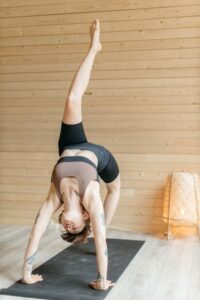
Prepare with reclining hand-to-big-toe pose, which teaches the same leg action without the balance, plus tree pose and standing forward bend. In the Ashtanga order the next pose is half-bound lotus standing forward bend. Bird of paradise uses the same side-leg extension with a bind.

Where it is taught

You will find it in Ashtanga, Iyengar, vinyasa and hatha classes. Browse other standing balances in the pose library.

Preparatory poses

Follow-up poses and transitions

Counterposes

Related poses

More balancing poses

Frequently asked questions

Do I have to straighten my leg?

No. Keep the knee bent and hold the knee, or use a strap around the foot. A long spine and a level pelvis matter more than a straight leg.

What is the Ashtanga version of hand-to-big-toe pose?

In the Ashtanga standing sequence the leg goes forward with a fold over it, then opens to the side, then returns to the front and is held up without the hands, five breaths in each position.

How is it different from Padangusthasana?

Padangusthasana (standing big-toe pose) is a forward bend with both feet on the floor, holding the big toes. Utthita Hasta Padangusthasana is a one-leg balance holding the lifted foot.

What is revolved hand-to-big-toe pose?

An advanced variation in which the opposite hand holds the lifted foot and the torso turns toward the lifted leg. It is described in its own section on this page.

Sources

  1. Extended Hand-to-Big-Toe Pose (Utthita Hasta Padangusthasana), Yoga Journal (accessed October 6, 2026)
  2. B.K.S. Iyengar, Light on Yoga (1966), asana 11 Utthita Hasta Padangusthasana, plates 20-23, Allen & Unwin (Internet Archive record) (accessed October 6, 2026)
  3. Utthita Hasta Padangushthasana A (Ronald Steiner), AshtangaYoga.info (accessed October 6, 2026)
  4. Utthita Hasta Padangushthasana B (Ronald Steiner), AshtangaYoga.info (accessed October 6, 2026)
  5. Swami Satyananda Saraswati, Asana Pranayama Mudra Bandha: Utthita hasta padangusthasana, Bihar School of Yoga (Internet Archive) (accessed October 6, 2026)

Facts checked on October 6, 2026