Revolved Head-to-Knee Pose (Parivrtta Janu Sirsasana): a seated side bend

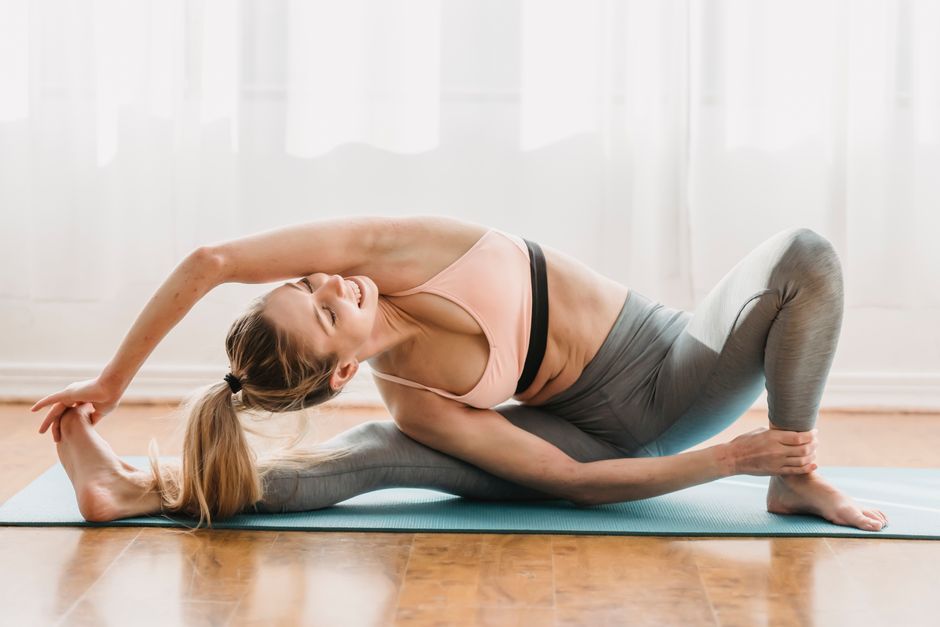
Revolved head-to-knee pose (Parivrtta Janu Sirsasana) is a seated side bend with a twist: one leg straight, one bent, the torso leaning along the straight leg with the chest turned up.

Not yet reviewed by a qualified teacher Names and shape checked against 3 sources

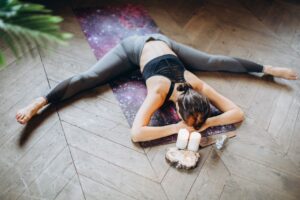
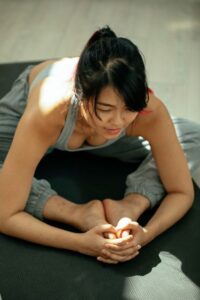
Full body of young flexible female athlete in sportswear doing Revolved Head to Knee stretching asana during yoga session in light studio
Sanskrit name
Parivṛtta Jānu Śīrṣāsana (source)
Also called
Revolved Head-of-the-Knee Pose
Other spellings
Parivrtta Janu Sirsasana, Parivritta Janu Sirsasana, Parivrtta Janu Shirshasana
Pose family
Seated, Side bend, Twist
Starting position
Seated
Movement
Lateral bend, Twist
Taught in
Hatha Yoga: The Historical Term and the Modern Class, Vinyasa Yoga: Flow, Breath and What to Expect
Difficulty
Intermediate
Prerequisite skills
Comfortable in head-to-knee pose and seated wide-angle poses; reasonable hamstring length and side-body flexibility.
Body areas
Hamstrings, Hips, Shoulders, Spine
Props
Blanket, Block, Chair, Mat, Strap
Practised
Solo

Names in different traditions

TraditionName usedNote
IyengarParivrtta Janu Sirsasana (Revolved Head-of-the-Knee Pose)Taught as a seated side bend and twist with the bent knee drawn back (Marla Apt, senior certified Iyengar teacher, master class originally in Yoga Journal).

Step by step

Coming into the pose

  1. Sit with both legs wide, or in staff pose. Bend the right knee out to the side and bring the right heel toward the groin; draw the knee back a little so the angle between the legs is wide. Keep the left leg straight.
  2. Inhale and lengthen the spine. Exhale and turn the chest to the right, away from the straight leg.

In the pose

  1. Keeping the turn, lean the torso sideways to the left along the straight leg. Slide the left shoulder toward the inside of the left knee and rest the left forearm on the floor or a block, palm up, or hold the inner edge of the left foot.
  2. Raise the right arm over the right ear and, if it is within easy reach, hold the outer edge of the left foot.
  3. Press the left thigh down and the right knee toward the floor. Inhale to lengthen the lower side of the waist; exhale to turn the chest further toward the ceiling.
  4. Stay for about ten breaths to a minute.

Coming out

  1. Inhale, release the hands and come back up to sitting the way you went in. Straighten the bent leg and repeat on the other side.

Breathing

Inhale to lengthen both sides of the trunk, exhale to deepen the turn. Let the breath move into the upper, stretched side of the ribs. Keep the throat and jaw soft.

Alignment cues

  • Turn first, then bend sideways; the chest faces away from the straight leg.
  • Keep the lower shoulder in contact with the inner knee, bending the straight leg if needed.
  • Lengthen the side of the waist closest to the floor, not only the top side.
  • Keep the front of the straight thigh engaged and the kneecap pointing up.
  • Press the bent knee down to counterbalance the lean.

Common alignment errors

  • Rounding forward over the straight leg so the pose becomes a forward fold.
  • Collapsing the lower side of the waist to reach the foot with the top hand.
  • Pulling with the arms before the hamstrings have released.
  • Craning the neck to look up; turn the head only as far as the chest turns.

Modifications and easier variations

  • Lean only as far as the spine stays long, with the lower hand on the shin or a block and the top hand on the hip. block

Advanced variations

  • Holding the outer edge of the foot with the top hand and resting the back of the lower shoulder against the inner leg.

Props and chair adaptations

  • Sit on a folded blanket or bolster to raise the hips; place a block under the lower forearm. blanket
  • Loop a strap around the foot of the straight leg and hold it with the top hand. strap
  • Chair version: sit wide on a chair with one leg extended to the side and the other foot in, rest the forearm on the extended-leg thigh, lift the other arm and bend sideways (Yoga Journal). chair

Precautions

  • Hamstring attachment: stop if you feel pulling at the sitting bone; bend the straight knee.
  • Back, neck or shoulder injury: keep the lean small and the top hand on the hip; ask your doctor or physiotherapist if unsure.
  • Inner-knee pain in the bent leg: support the thigh with a block or keep the leg straight.

Learn it with a teacher: The easier versions can be practised alone. Ask a teacher to check the turn if you feel strain in the lower back, or before working with the bound foot hold.

General information, not medical advice. Poses do not cure illness. If you are pregnant, injured or have a health condition, check with your doctor and tell your teacher before you practise.

In short: revolved head-to-knee pose is a seated side bend with a twist. You sit with one leg straight and the other bent out to the side, lean sideways over the straight leg, and turn the chest up toward the ceiling with the top arm reaching overhead. Despite the name, it is mainly a long stretch of the side body, not a forward fold.

It is taught in Iyengar, hatha and vinyasa classes, usually after standing poses and simpler seated folds have warmed the hamstrings and the sides of the body. Many people find it one of the most satisfying stretches of a class. Below we explain the name, the cues behind the steps, the precautions and where it fits.

What the name means, and why it is a side bend

The Sanskrit name is Parivṛtta Jānu Śīrṣāsana (usually written Parivrtta Janu Sirsasana): parivṛtta means turned or revolved, and jānu śīrṣāsana is head-to-knee pose. The legs are set up the same way as in head-to-knee pose, but instead of folding forward over the straight leg you face away from it, bend the trunk sideways along it and rotate the chest open. Senior Iyengar teacher Marla Apt describes it as a seated side bend and twist; Yoga Journal’s pose page calls it a seated fold with a side bend and twist. So if a teacher asks you to bring your “head to the knee” here, they mean the side of the head and the shoulder moving toward the inner knee of the straight leg.

Making the pose work

Set the bent leg first. In this pose the bent knee is drawn further back than in head-to-knee pose, widening the angle between the legs, and it presses toward the floor to counterbalance the weight of the torso leaning the other way. Then turn the chest to face away from the straight leg before you lean: the twist comes first, the side bend second. As you lean, slide the lower shoulder along the inside of the straight knee and rest the forearm or elbow on the floor or a block inside the leg. The top arm reaches over the ear.

The common problem is that the lower side of the waist collapses while the upper side overstretches. Marla Apt’s cue is to keep lengthening the side closest to the floor so both sides of the trunk become more even, and to keep the hips firm so the turn starts low in the torso rather than only in the shoulders. Yoga Journal’s beginner tip is to keep the bottom shoulder in contact with the inner knee, even if that means bending the straight leg a little. Hold for about ten breaths to a minute, then repeat on the other side.
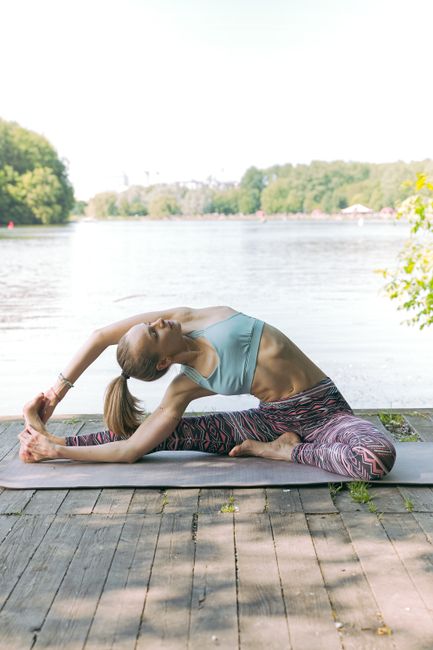
Caucasian woman performing yoga on a dock by a lake, showcasing flexibility and wellness.

Precautions in plain words

The hamstrings of the straight leg are vulnerable near the sitting bone. Yoga Journal advises keeping the front of the thigh engaged and never pulling the body down before the hamstrings have released. Bend the straight knee if you feel pulling at the sitting bone or behind the knee. With a back, neck or shoulder injury, keep the lean small and the top hand on the hip, and ask your doctor or physiotherapist if you are unsure. With an inner-knee problem in the bent leg, support it or keep the leg straight. This page is general information, not individual advice.

Preparation and what comes next

Good preparation includes extended side angle pose, which lengthens the same side of the body standing up, seated wide-angle forward bend, bound angle pose and reclining hand-to-big-toe pose. Afterwards, a simple fold such as seated forward bend or child’s pose evens out the spine. If you cannot sit on the floor, a chair version gives a similar side stretch.

You will meet revolved head-to-knee pose in Iyengar, hatha and vinyasa classes. Slow breathing into the stretched side of the ribs, as in diaphragmatic breathing, helps you stay without strain.
Preparatory poses

Follow-up poses and transitions

Counterposes

Related poses

More seated poses

Frequently asked questions

Is revolved head-to-knee pose a forward bend?

Not really. The legs are as in head-to-knee pose, but you face away from the straight leg and bend sideways along it while the chest turns up. It is mainly a side bend with a twist.

What is it called in Sanskrit?

Parivṛtta Jānu Śīrṣāsana, usually written Parivrtta Janu Sirsasana. Parivṛtta means revolved.

I can’t reach my foot. What should I do?

Rest the lower forearm on a block inside the straight leg and keep the top hand on your hip or reach it overhead without holding anything. A strap around the foot also helps.

How long should I hold it?

About ten breaths to a minute on each side, per Yoga Journal’s instructions, as long as the breath stays smooth.

Sources

  1. Revolved Head-to-Knee Pose: How to Practice Parivrtta Janu Sirsasana, Yoga Journal (accessed October 6, 2026)
  2. Parivrtta Janu Sirsasana master class (originally published in Yoga Journal), Marla Apt, senior certified Iyengar Yoga teacher (accessed October 6, 2026)
  3. Challenge Pose: 5 Steps to Master Parivrtta Janu Sirsasana, Yoga Journal (accessed October 6, 2026)

Facts checked on October 6, 2026