Handstand (Adho Mukha Vrksasana): wall work, steps and wrist care

Handstand (Adho Mukha Vrksasana), the downward-facing tree, balances the whole body upside down on the hands. An advanced inversion learned step by step at a wall.

Not yet reviewed by a qualified teacher Names and shape checked against 3 sources

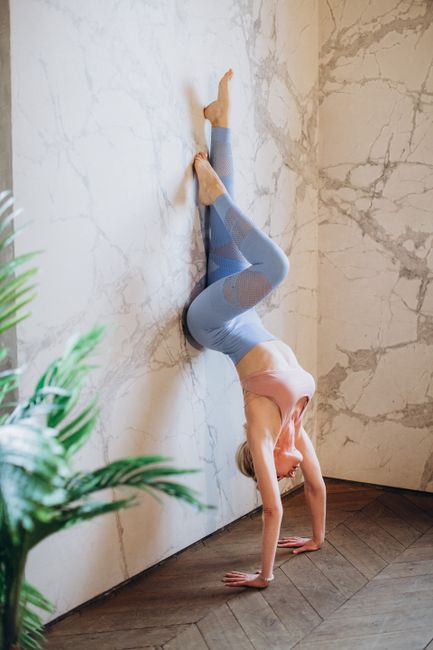
Woman performing a yoga handstand against a marble wall indoors, emphasizing fitness and balance.
Sanskrit name
Adho Mukha Vṛkṣāsana अधोमुखवृक्षासन (source)
Also called
Downward-Facing Tree
Other spellings
Adho Mukha Vrksasana, Adho Mukha Vrikshasana
Pose family
Arm balance, Inversion
Starting position
Hands-supported
Movement
Balance, Inversion
Taught in
Vinyasa Yoga: Flow, Breath and What to Expect
Difficulty
Advanced
Prerequisite skills
Strong downward dog and plank, full arms-overhead shoulder range, wrists that tolerate full weight, and confidence in the L-shape at the wall.
Body areas
Arms and wrists, Core, Shoulders
Props
Chair, Mat, Wall
Practised
Solo

Names in different traditions

TraditionName usedNote
Iyengar (Light on Yoga)Adho Mukha VṛkṣāsanaPlate 359; taught against the wall with fingers toward the wall, palms turned outward, and later palms back (Iyengar Yoga UK I8 Teaching Syllabi).
Modern vinyasa and Yoga InternationalAdho Mukha Vrikshasana (handstand)Taught as a peak pose with a stage-by-stage (vinyasa krama) build-up (Yoga International).

Step by step

Coming into the pose

  1. Start in downward dog with the hands a few inches from a wall, wrist creases parallel to the front edge, pressing evenly through the hands.
  2. On an exhale, step one foot a third to halfway toward the hands and move the shoulders forward directly over the wrists. Bend that knee slightly.
  3. Lift the other leg into a standing split, keeping the shoulders over the wrists. Gaze between and slightly ahead of the index fingers.

In the pose

  1. Take small hops off the bent leg, lifting through the inner thigh of the raised leg, until the hips come over the shoulders and the second leg joins the first, heels resting lightly on the wall.
  2. Draw the belly and low ribs in, reach the tailbone toward the heels and the heels up. Stay five to eight breaths (Yoga Journal).

Coming out

  1. Lower one leg at a time to the floor and rest in child’s pose or standing forward bend.

Breathing

Exhale as you step in and as you hop; breathe steadily while up. If you hold the breath on every attempt, return to the L-shape at the wall.

Alignment cues

  • Shoulders stacked over the wrists, arms straight.
  • Hips over the shoulders before the legs.
  • Ribs and belly in; no banana-shaped back.
  • Legs together, reaching up through the heels.

Common alignment errors

  • Swinging the second leg overhead instead of lifting the hips.
  • Arching the lower back against the wall.
  • Shoulders behind the wrists, so the arms bend.
  • Cold wrists.

Modifications and easier variations

  • Standing split with small hops, without fully inverting. none

Advanced variations

  • Free-standing handstand away from the wall.
  • Iyengar variations with the palms turned out or back (as in peacock).

Props and chair adaptations

  • L-shape: heels against the wall in downward dog, walk the feet up the wall until the legs are parallel to the floor; lift one leg at a time. wall
  • Kick up facing the wall with the heels resting on it; take one foot, then the other, away. wall
  • Back to a sturdy chair in downward dog, one foot on the seat, hop the other leg up. chair

Precautions

  • Wrist pain or carpal tunnel problems: avoid.
  • Shoulder, elbow, neck or back injury: avoid.
  • High blood pressure, heart conditions, glaucoma, detached retina or recent eye surgery: avoid.
  • Pregnancy: do not start learning inversions.

Learn it with a teacher: Learn the kick-up and a safe exit with a teacher; practise at a wall until you can hold steadily and come down with control.

General information, not medical advice. Poses do not cure illness. If you are pregnant, injured or have a health condition, check with your doctor and tell your teacher before you practise.

In short: handstand is the full inversion on the hands: palms shoulder-width on the floor, arms straight, shoulders over the wrists and the body stacked vertically above them. In yoga it is usually learned at a wall, one step at a time, and it puts the whole body weight through the wrists, so it is an advanced pose.

Yoga Journal reminds readers that, like all balances, handstand asks you to feel comfortable with instability: gripping hard makes it harder to make the small corrections that keep you up. The wall gives you room to learn that.

The name

Adho mukha means face down and vṛkṣa tree, so Adho Mukha Vṛkṣāsana is the downward-facing tree: tree pose turned upside down. Yoga Journal and Yoga International both use this name for handstand, and the Iyengar Yoga (UK) syllabus lists it at plate 359 of Light on Yoga. In the Iyengar syllabus it is first taught against the wall, with the fingers pointing toward the wall and, later, with the palms turned out or back. Yoga International calls it an intermediate-level asana; we list it as advanced because of the wrist load and the fall risk when practised away from a wall.

Making the pose work

Start in downward dog with the wrist creases parallel to the front of the mat, pressing evenly through the hands. Yoga Journal’s progression: step one foot a third to halfway toward the hands and move the shoulders forward directly over the wrists; lift the other leg into a standing split; then take small hops off the bent leg, lifting through the inner thigh of the raised leg. Focus on bringing the hips over the shoulders rather than swinging the second leg overhead. Gaze at a point between and slightly ahead of the index fingers.

At the wall, let the heels rest lightly on it. Avoid arching the back and pushing the chest out: draw the belly and low ribs in and reach the tailbone toward the heels, hugging the legs together. Yoga Journal suggests staying five to eight breaths, then coming down one leg at a time. A gentler wall version starts in downward dog with the heels at the wall and walks the feet up until the legs are parallel to the floor, in an L shape.
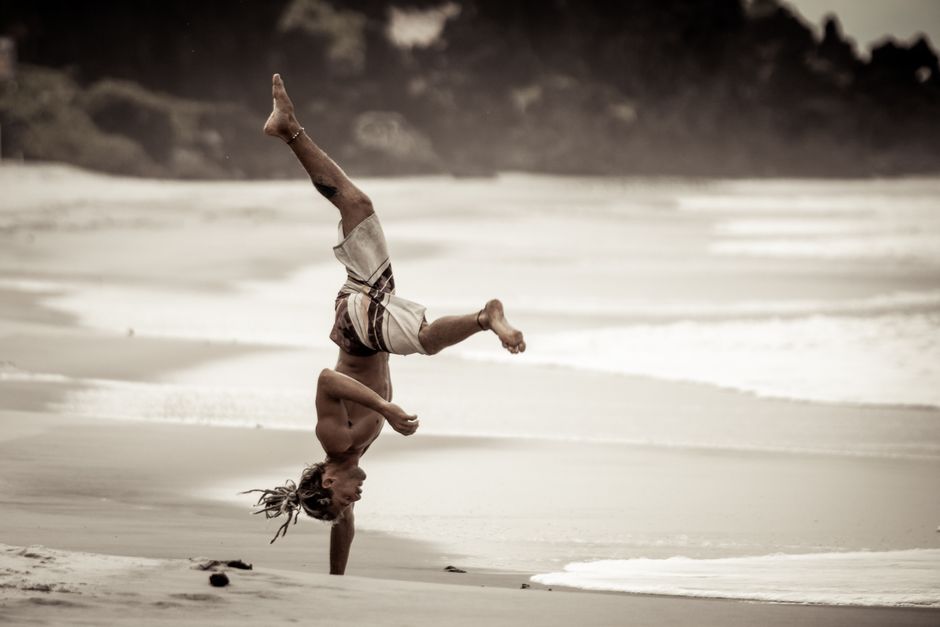
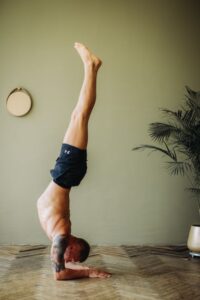
Man performing a handstand on Pipa Beach, Brazil. Capturing balance and energy.

Precautions in plain words

Warm the wrists well and skip handstand with wrist pain, carpal tunnel problems, or shoulder, elbow, neck or back injuries. As an inversion, avoid it with high blood pressure, heart conditions, glaucoma, a detached retina or recent eye surgery, and do not start learning it during pregnancy. Practise where there is space to fall, learn to come down to the side (a cartwheel exit) with a teacher, and do not let anyone throw your legs up. This page is general information, not individual advice.

Preparation and what comes next

Prepare with downward dog, plank, standing split, dolphin and the L-shape at the wall. Yoga Journal also offers a chair version: with the back to a sturdy chair in downward dog, place one foot on the seat and hop the other leg up. Afterwards, rest in child’s pose or stand in standing forward bend. Handstand leads on to free balance away from the wall and to transitions such as floating from downward dog.

A simple way to practise it. A steady way to build handstand is a few minutes several times a week: hold the L-shape at the wall for a few breaths, practise small hops from standing split, then kick up with the heels landing softly on the wall. Rest between attempts in child’s pose and shake out the wrists. Over time, take one foot and then the other away from the wall. Short, regular practice tends to work better than long sessions that exhaust the wrists and shoulders.

You will meet handstand in Iyengar, vinyasa and power yoga classes and in many inversion workshops.
Preparatory poses

Follow-up poses and transitions

Counterposes

Related poses

More arm balance poses

Frequently asked questions

How do I start learning handstand?

Build strength in downward dog and plank, then practise the L-shape with the feet on a wall and small hops from standing split, with the heels landing lightly on the wall.

Why is handstand called downward-facing tree?

Adho mukha means face down and vrksa tree: it is tree pose upside down.

Is handstand bad for the wrists?

It puts the whole body weight on them. Warm up, build up gradually and skip it with wrist pain or carpal tunnel problems.

Sources

  1. Handstand: How to Practice Adho Mukha Vrksasana, Yoga Journal (accessed October 6, 2026)
  2. Handstand Tutorial (adho mukha vrikshasana), Yoga International (accessed October 6, 2026)
  3. I8 Teaching Syllabi (asanas with Light on Yoga plate numbers), Iyengar Yoga (UK) (accessed October 6, 2026)

Facts checked on October 6, 2026