Side-Reclining Leg Lift (Anantasana): steps, strap version and cautions

Side-reclining leg lift (Anantasana, reclining Vishnu pose) is lying on one side with the head on the hand and the top leg stretched up, holding the big toe or a strap. Steps, cues and cautions.

Not yet reviewed by a qualified teacher Names and shape checked against 2 sources

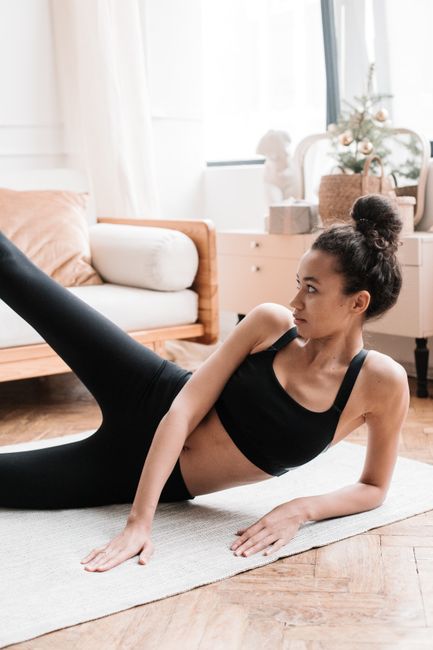
A young woman in activewear doing a focused exercise routine on a yoga mat indoors.
Sanskrit name
Anantāsana अनन्तासन (source)
Also called
Reclining Vishnu Pose, Vishnu's Couch Pose, Sleeping Vishnu Pose, Side-Reclining Leg Lift
Other spellings
Anantasana
Pose family
Balancing, Supine
Starting position
Reclining (on the back)
Movement
Balance, Forward fold
Taught in
Hatha Yoga: The Historical Term and the Modern Class, Vinyasa Yoga: Flow, Breath and What to Expect
Difficulty
Intermediate
Prerequisite skills
Hamstrings long enough to lift a straight leg toward vertical with a strap; some core control to stay on the side.
Body areas
Core, Hamstrings, Hips, Legs
Props
Mat, Strap, Wall
Practised
Solo

Names in different traditions

TraditionName usedNote
Iyengar (Light on Yoga)AnantāsanaAsana 109, plate 290: lie on one side, head on the hand, catch the big toe and stretch arm and leg up together; 15 to 20 seconds each side.
Yoga Journal pose librarySide-Reclining Leg Lift (Anantasana)Level 1; strap around the sole if the toe is out of reach; 30 seconds to 1 minute each side; soles against a wall for stability.

Step by step

Coming into the pose

  1. Lie on your back, then roll onto your left side so the body is in one straight line from the heels to the head. Flex both feet.
  2. Stretch the left arm along the floor beyond the head, bend the elbow and rest the head in the left palm.
  3. Bend the right knee, turning the leg out so the knee points up, and catch the right big toe with the first two fingers and thumb, or loop a strap around the sole.

In the pose

  1. On an exhalation, straighten the right arm and leg up toward the ceiling together. Press out through both heels.
  2. Keep the hips stacked: the top hip tends to roll back, so draw it slightly forward and lengthen the bottom leg. Hold 15 seconds to a minute.

Coming out

  1. Bend the right knee, release the toe, lower the leg, roll onto the back and repeat on the other side for the same time.

Breathing

Normal, steady breathing. Exhale as you straighten the leg up; if you have to hold your breath to stay balanced, use a strap or the wall.

Alignment cues

  • One straight line from the bottom heel to the bottom elbow.
  • Bottom foot flexed and pressing out through the heel.
  • Top hip stacked over the bottom hip, not rolling back.
  • Lift the leg only as far as the knee stays straight; use a strap rather than bending the knee.

Common alignment errors

  • Rolling backward or forward off the side.
  • Bending the knee of the raised leg to reach the toe.
  • Gripping the neck instead of letting the hand support the head.
  • Letting the bottom leg go slack.

Modifications and easier variations

  • Rest the head on the outstretched arm or a folded blanket instead of the hand. blanket

Advanced variations

  • Hold the leg close to vertical without the strap, keeping the bottom leg fully active.

Props and chair adaptations

  • Strap around the sole of the top foot if you cannot hold the big toe with a straight leg. strap
  • Lie with the back of the body or the soles against a wall for stability. wall
  • Bolster wedged behind the back if you still feel unstable (Yoga Journal beginner tip). bolster
  • No chair version; for a similar hamstring stretch, do reclining hand-to-big-toe pose on the back, or stand and rest the heel on a chair seat. chair

Precautions

  • Neck or shoulder pain: rest the head on the arm or a blanket instead of the hand.
  • Hamstring or groin strain: use a strap and lift the leg only partway.
  • Hip or sacroiliac pain: keep the leg lower and the hips stacked.
  • Pregnancy: lying on the side is usually comfortable, but skip the leg lift if it strains the belly or pelvis.

Learn it with a teacher: Fine to practise on your own with a strap and the wall. Learn the full big-toe hold with a teacher if you have hip or back issues.

General information, not medical advice. Poses do not cure illness. If you are pregnant, injured or have a health condition, check with your doctor and tell your teacher before you practise.

In short: side-reclining leg lift is lying on one side in a straight line, resting the head in the hand, and stretching the top leg up toward the ceiling while holding the big toe or a strap. It stretches the back and inner side of the raised leg and asks you to balance on a narrow base. It looks relaxed, which is part of the joke of its name, but staying stacked on the side takes steady work.

Below we explain the name, the cues that keep you from rolling off the side, the strap and wall versions, and where it fits in a practice.

The name

The Sanskrit name is Anantāsana. Ananta, “endless”, is a name of Vishnu and also of Shesha, the many-headed serpent on which Vishnu rests in Hindu mythology. In Light on Yoga, B.K.S. Iyengar tells the story of Vishnu sleeping on his serpent couch in the cosmic ocean, which is why the pose is also called reclining Vishnu or Vishnu’s couch pose. Yoga Journal lists it as Side-Reclining Leg Lift. It is an established name with the same shape in both sources (see what asana means).

How to make it work

Start with the base. Lie on the side with the heels, hips, shoulders and elbow in one line, and press out through the bottom heel with the foot flexed; Yoga Journal suggests bracing the soles against a wall if you wobble. Rest the head in the palm with the elbow sliding away from the body, so the underarm lengthens.

Then lift. Turn the top leg out, bend the knee, catch the big toe with the first two fingers and thumb, and straighten arm and leg up together on an exhalation. The raised leg tends to drift forward while the top buttock drops back; firming the back of the pelvis and drawing the top hip slightly forward helps the leg come closer to vertical. If the knee will not straighten, loop a strap around the sole. Iyengar gives 15 to 20 seconds each side; Yoga Journal suggests 30 seconds to a minute.

Building the pose in stages

Light on Yoga builds Anantasana in small steps, and each one is a useful place to stop. Begin lying flat on your back, then exhale and roll onto one side. Stretch the bottom arm beyond the head in line with the body, bend the elbow and rest the head in the palm, just above the ear. Iyengar suggests staying here for a few seconds with normal or deep breaths before going on. If that position already feels wobbly, it is enough for today: you are learning the long, straight line that the rest of the pose depends on.

Next, bend the top knee and catch the big toe with the thumb and first two fingers. On an exhale, stretch the arm and the leg up together. Hold with normal breathing. To come out, Iyengar again goes slowly: exhale, bend the knee back to the side-lying position, lower the head from the hand and roll onto your back before turning to the other side. Yoga Journal adds a short pause of a few breaths between sides.

Props when you wobble

If the soles against a wall are not enough to steady you, Yoga Journal suggests wedging a bolster along your back. A strap around the sole of the top foot lets you keep the knee straight without straining to reach the toe.

Common mistakes

  • Rolling backward: keep heels, hips and shoulders stacked in one line and press out through both heels.
  • Letting the leg swing forward: firm the back of the pelvis so the leg can move back toward vertical.
  • Hunching the neck: slide the elbow away from the body so the underarm stays long.
  • Grabbing the toe with a bent knee and calling it done: use a strap and straighten the leg instead.

In Iyengar’s suggested course, Anantasana comes in the second, intermediate course, next to reclining hand-to-big-toe pose, which shows how closely the two are linked.

Precautions in plain words

Lift only as far as the hamstrings allow with a straight knee; a strap is better than forcing. With neck or shoulder pain, rest the head on the outstretched arm or a folded blanket instead of the hand. With a hamstring, groin, hip or sacroiliac problem, keep the leg lower. During pregnancy side-lying is usually comfortable, but skip the lift if it strains the belly or pelvis. This page is general information, not individual advice.

Preparation, what comes next and where it is taught

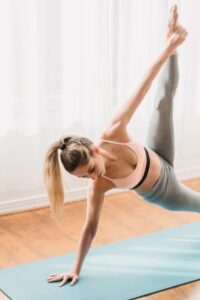
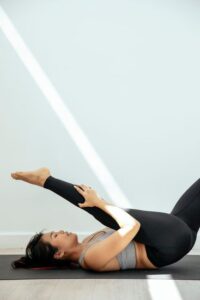
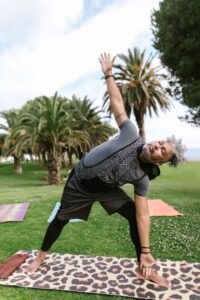
Reclining hand-to-big-toe pose, especially the leg-to-the-side version, is the best preparation: it is the same leg action with the back on the floor. Yoga Journal also lists gate pose and triangle pose as preparation and downward-facing dog as a follow-up. The standing cousin is extended hand-to-big-toe pose, and side plank works the same side-lying line with the body lifted. You will meet Anantasana in Iyengar, hatha and vinyasa classes.
Preparatory poses

Follow-up poses and transitions

Related poses

More balancing poses

Frequently asked questions

What does Anantasana mean?

Ananta, "endless", is a name of Vishnu and of the serpent Shesha on which he rests. B.K.S. Iyengar explains the pose in Light on Yoga with the image of Vishnu resting on his serpent couch.

How long should I hold side-reclining leg lift?

Light on Yoga gives 15 to 20 seconds; Yoga Journal suggests 30 seconds to a minute on each side.

Is Anantasana a beginner pose?

With a strap and the wall it is accessible to many beginners. Holding the big toe with a straight leg needs long hamstrings and steady balance on the side.

Sources

  1. B.K.S. Iyengar, Light on Yoga (Yoga Dipika), Digital Library of India (Internet Archive) (accessed October 6, 2026)
  2. Side-Reclining Leg Lift (Anantasana), Yoga Journal (accessed October 6, 2026)

Facts checked on October 6, 2026