Legs Up the Wall: set-up, props and how it relates to Viparita Karani

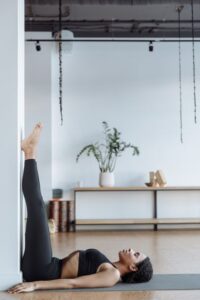
Legs up the wall is a fully supported resting inversion: lying on your back with the legs resting up a wall, often with a bolster under the pelvis. A modern adaptation often called Viparita Karani; suitable for most beginners.

Not yet reviewed by a qualified teacher Names and shape checked against 5 sources

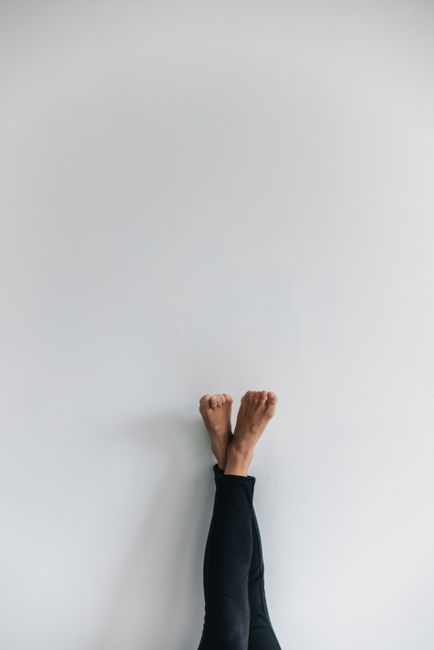
Minimalist image showing feet and legs in black leggings against a blank white wall.
Sanskrit name
No established Sanskrit name: a modern descriptive name
Also called
Legs-Up-the-Wall Pose, Legs Up the Wall Pose, Viparita Karani (modern usage)
Record
Supported adaptation
Variation of
Viparita Karani (Inverted Action): the hatha mudra, the asana and the supported version
Pose family
Inversion, Resting and restorative
Starting position
Reclining (on the back)
Movement
Inversion, Neutral rest
Taught in
What Is Yin Yoga? Long Holds, Slow Pace and a Typical Class, Hatha Yoga: The Historical Term and the Modern Class
Difficulty
Beginner
Prerequisite skills
Being able to get down to the floor and roll onto your back; no inversion experience needed.
Body areas
Hamstrings, Legs, Spine
Props
Blanket, Bolster, Strap, Wall
Practised
Solo

Names in different traditions

TraditionName usedNote
Iyengar (via Yoga Journal, Mary Dunn)Viparita Karani (supported)Bolster or blankets under the pelvis, legs up the wall.
Modern restorative classesLegs-up-the-Wall Pose (often called Viparita Karani)5 to 20 minutes (Yoga Journal, Cyndi Lee; YogaUOnline).
Bihar School of Yoga(resting the legs against a wall)Suggested for people unable to do Vipareeta Karani Asana, such as pregnant women or elderly people (Yoga Magazine).

Step by step

Coming into the pose

  1. Optional: place a bolster or two firm folded blankets parallel to the wall, a few inches away, and a folded blanket where your head will be.
  2. Sit sideways on the support (or the floor) with one hip close to the wall. Lean onto the outer hip and elbow and swing the legs up the wall as you lower the back to the floor.
  3. Adjust: the support runs from the back of the pelvis to the lowest ribs, the sitting bones drop slightly toward the wall, and the backs of the legs rest on the wall without strain. Move away from the wall if the hamstrings pull.

In the pose

  1. Rest the arms out to the sides or on the belly. Breathe naturally and stay 5 to 20 minutes (Yoga Journal; YogaUOnline), starting with about 5.

Coming out

  1. Bend the knees, press the feet into the wall to slide off the support, roll onto your side, rest a few breaths and push up to sitting, head last.

Breathing

Natural breathing. If you like, take a few breaths with the exhale longer than the inhale, then let the breath settle on its own.

Alignment cues

  • Pelvis fully supported; buttocks slightly off the edge toward the wall.
  • Front of the torso roughly level, not sloping down toward the head.
  • Shoulders relaxed on the floor, space between ears and shoulders.
  • Legs relaxed; a strap can hold them together.

Common alignment errors

  • Sitting so close to the wall that the hamstrings are strained and the pelvis tucks.
  • Support only under the lower back, so you slide toward your head.
  • Sitting up quickly at the end.

Modifications and easier variations

  • No props: back flat on the floor, buttocks near the wall. wall

Advanced variations

Props and chair adaptations

  • Bolster or folded blankets under the pelvis, parallel to the wall. bolster
  • Strap around the shins or thighs; eye pillow; blanket under head and neck. strap
  • Calves resting on the seat of a chair instead of legs up the wall, for tight hamstrings or limited mobility. chair

Precautions

  • Glaucoma, detached retina or other eye conditions, or uncontrolled high blood pressure: ask your doctor first; keep the pelvis low.
  • Menstruation: some traditions advise against it (noted by Yoga Journal); follow your teacher.
  • Later pregnancy: keep the stay short or raise the upper body; ask your provider.
  • Tingling or numbness in the legs: bend the knees and come out.

Learn it with a teacher: Generally safe to practise alone. Ask a teacher to help with the prop set-up the first time if the pelvis keeps sliding or the lower back feels uncomfortable.

General information, not medical advice. Poses do not cure illness. If you are pregnant, injured or have a health condition, check with your doctor and tell your teacher before you practise.

In short: legs up the wall is a fully supported resting pose. You lie on your back with the buttocks close to a wall and the legs resting up it, often with a folded blanket or bolster under the pelvis, and simply stay for 5 to 20 minutes. Nothing has to be held up by muscle, which makes it one of the most accessible inversions, suitable for most beginners.

It is a supported adaptation rather than a classical asana, and it is the shape most people picture when a teacher says “Viparita Karani”. This page explains how the two relate.

The name: legs up the wall and Viparita Karani

Legs up the wall is a modern descriptive name; there is no separate classical Sanskrit name for this exact shape. In modern classes and in Yoga Journal it is very often called Viparita Karani, which means “inverted action”. That is modern usage. In the Hatha Yoga Pradipika, Viparita Karani is a mudra practised with the head down and the feet up, and the Bihar School teaches an inverted asana of that name with the hips lifted on the hands. The Iyengar tradition bridged the two with a version on a bolster against the wall. Interestingly, the Bihar School’s own magazine suggests that people who cannot do its inverted asana, such as pregnant women or elderly people, simply rest their legs against a wall. So legs up the wall is best understood as the gentlest, most supported member of the Viparita Karani family: the legs are raised, but the wall and the floor do all the holding.

Setting it up

The simplest version needs only a wall: sit sideways with one hip against it, roll onto your back as you swing the legs up, and shuffle the buttocks close to the wall. If the hamstrings protest, move a few inches further away; the legs do not need to be perfectly straight or touching the wall all the way down.

For the supported version, Yoga Journal’s Iyengar-based instructions place a bolster or two firm folded blankets parallel to the wall, a few inches away, so the support runs from the back of the pelvis to the lowest ribs. Let the sitting bones drop slightly off the edge toward the wall, so the lower belly settles and you do not feel you are sliding toward your head. Rest the shoulders on the floor, arms out to the sides, and add a folded blanket under the head and neck if needed. A loose strap around the shins or thighs lets the legs relax completely, and an eye pillow helps many people let go.

Staying and coming out

Yoga Journal’s Cyndi Lee suggests 5 to 20 minutes, starting with about 5 if restorative yoga is new to you; YogaUOnline gives the same range. Breathe naturally. Many people find the pose calming and a good way to end a practice or a long day of standing or sitting. To come out, bend the knees, slide the feet down the wall or press them into it to lift the hips off the support, then roll onto your side, rest there for a few breaths and push up to sitting with the head coming up last.

Precautions in plain words

Legs up the wall is gentle, but it is still a mild inversion. With glaucoma, a detached retina or other eye conditions, or with uncontrolled high blood pressure, ask your doctor first and keep the pelvis low or flat on the floor. Cyndi Lee notes that some yoga traditions advise against it during menstruation; follow your own teacher’s guidance. Later in pregnancy, lying flat on the back can be uncomfortable, so keep the stay short or raise the upper body, and ask your provider. If your legs tingle or go numb, bend the knees and come out. This page is general information, not individual advice.

Related practices

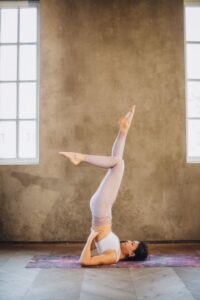
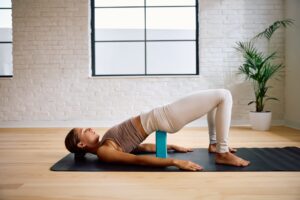
Legs up the wall fits naturally at the end of a restorative sequence or a bedtime practice, before corpse pose. Slow breathing, such as a gentle diaphragmatic breath with a longer exhale, sits well in it. It also prepares you for active inversions such as Viparita Karani with the hands supporting the hips and shoulderstand. Related restorative poses include supported bridge and reclining bound angle.

You will meet it in restorative, Iyengar, yin and gentle hatha classes.
Follow-up poses and transitions

Counterposes

Main pose

Related poses

More inversion poses

Frequently asked questions

Is legs up the wall the same as Viparita Karani?

It is often called Viparita Karani in modern classes. Traditionally, Viparita Karani is a hatha mudra and, in the Bihar School, an inverted asana with the hips lifted on the hands. Legs up the wall is the fully supported modern adaptation.

How long should I stay in legs up the wall?

Usually 5 to 20 minutes. Start with about 5 if you are new to restorative poses.

Do my legs have to touch the wall?

No. If the backs of the legs pull, move a few inches away from the wall or bend the knees slightly.

Can beginners do it?

Yes. It is one of the most accessible inversions. Check the precautions first if you have eye conditions, high blood pressure or are pregnant.

Sources

  1. Mastering Viparita Karani (Mary Dunn), Yoga Journal (accessed October 6, 2026)
  2. Do Less, Relax More: Legs-up-the-Wall Pose (Cyndi Lee), Yoga Journal (accessed October 6, 2026)
  3. How to Practice Legs Up the Wall Pose (Viparita Karani), YogaUOnline (accessed October 6, 2026)
  4. Know the Asana: Vipareeta Karani Asana, Yoga Magazine, Bihar School of Yoga (accessed October 6, 2026)
  5. Hatha Yoga Pradipika, translated by Pancham Sinh (1914): The Viparita Karani, Internet Archive (accessed October 6, 2026)

Facts checked on October 6, 2026