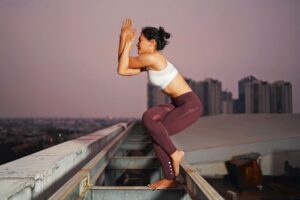
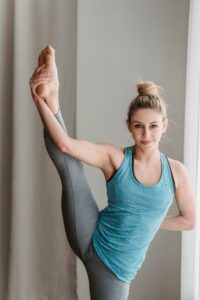
Revolved Half Moon Pose (Parivrtta Ardha Chandrasana): steps and props

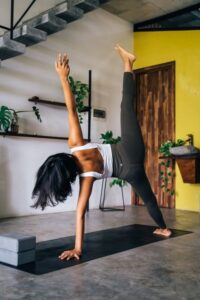
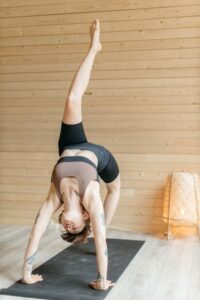
Revolved half moon (Parivrtta Ardha Chandrasana) is a one-leg standing balance with a twist toward the standing leg. Steps, block, chair and wall options, and precautions.

Not yet reviewed by a qualified teacher Names and shape checked against 5 sources

Sanskrit name
Parivṛtta Ardha Candrāsana परिवृत्त अर्धचन्द्रासन (source)
Also called
Twisted Half Moon, Revolved Half Moon
Other spellings
Parivrtta Ardha Chandrasana, Parivritta Ardha Chandrasana
Pose family
Balancing, Standing, Twist
Starting position
Standing
Movement
Balance, Twist
Taught in
Vinyasa Yoga: Flow, Breath and What to Expect
Difficulty
Intermediate
Prerequisite skills
Steady half moon and warrior III; revolved triangle without strain; hamstrings long enough to reach a block with a straight standing leg.
Body areas
Core, Hamstrings, Hips, Legs, Spine
Props
Block, Chair, Wall
Practised
Solo

Names in different traditions

TraditionName usedNote
Iyengar (Iyengar Yoga Canada syllabus)Parivrtta Ardha ChandrasanaListed among standing poses with a book reference; shape not described in the syllabus.
Iyengar (B.K.S. Iyengar Yoga Association of Vancouver)Parivrtta Ardha Chandrasana (Revolved Half Moon Pose)Home practice sequence: revolved triangle and revolved side angle at the wall first; then upper hand on the wall and lower hand on a brick, or the back leg on a chair back.
Yoga InternationalRevolved Half Moon (Parivrtta Ardha Chandrasana pronunciation)From a lunge into a modified warrior III, fingertips on the floor or blocks, back heel at hip height, twist from the back ribs, top arm up when the shoulders stack; back foot on a wall for stability.

Step by step

Coming into the pose

  1. From a wide stance or triangle with the right leg forward, place the left hand on the left hip and step the back foot in a little.
  2. Bend the right knee and place a block on the floor in front of and slightly outside the right foot.
  3. Shift your weight onto the right foot and lift the left leg straight back to hip height, toes pointing down. Press the right big-toe mound down and draw the right hip in.

In the pose

  1. Turn both hip points to face the floor. Place the left hand on the block under the left shoulder and bring the right hand to the right hip.
  2. Lengthen the spine, then rotate the chest toward the right. When steady, reach the right arm up and, if the neck allows, look toward the hand.
  3. Reach back through the left heel and keep the pelvis level. Stay for several breaths with a slight bend in the standing knee.

Coming out

  1. Bring the right hand to the hip, bend the standing knee, lower the left foot to the floor and step back to your starting stance. Repeat on the other side.

Breathing

Keep the breath steady and unforced. Lengthen on the inhale; turn a little further on the exhale only if the balance and the lower back stay comfortable.

Alignment cues

  • Standing foot parallel to the edge of the mat; big-toe mound down, arch lifted.
  • Both hip points face the floor; the lifted hip stays level.
  • Back toes point down; reach out through the centre of the heel.
  • Lengthen first, twist second; the rotation comes from the chest.
  • Bottom hand under the shoulder, on a block if needed.

Common alignment errors

  • Twisting before the standing leg is set, so the balance goes.
  • Letting the lifted hip open toward the ceiling, which turns the pose into a tilted half moon.
  • Rounding the back to reach the floor instead of using a block.
  • Locking the standing knee.

Modifications and easier variations

  • Keep the top hand on the hip, or open the top arm only to shoulder height. none

Props and chair adaptations

  • Block under the bottom hand, at its tallest height if needed. block
  • Bottom hand on the seat of a chair; top hand on the hip or lower back. chair
  • Stand one leg length from a wall and press the lifted foot into it while you explore the twist. wall

Precautions

  • Lower back, sacroiliac or disc problems, or a hamstring injury: skip the rotation or ask your doctor or physical therapist first.
  • Neck problems: keep the gaze down.
  • Low blood pressure, dizziness or balance difficulties: practise next to a wall.
  • Pregnancy: avoid twists that compress the belly; talk to your midwife or doctor about an open, supported version.

Learn it with a teacher: Learn this one with a teacher if you can: it combines a balance, a twist and a hamstring stretch, and small misalignments of the pelvis are hard to feel on your own.

General information, not medical advice. Poses do not cure illness. If you are pregnant, injured or have a health condition, check with your doctor and tell your teacher before you practise.

In short: revolved half moon is a one-leg standing balance with a twist. You stand on one leg, lift the other leg straight back at hip height, place the opposite hand on a block or the floor and turn the chest toward the standing leg. It asks for steady balance, hamstring length and core strength, so learn it with a block and a wall.

Where half moon opens the chest to the side, revolved half moon turns it the other way, so the pelvis faces the floor and the upper body rotates around the spine. Yoga Journal describes it as a pose that demands a lot from the hamstrings, pelvis, sacrum and lower back, and calls for considerable core strength. That makes it an intermediate-to-advanced balance, not a beginner pose.

The name

Parivṛtta means turned around or revolved, ardha half, candra (chandra) moon and āsana posture. The name appears in Yoga Journal’s master class by Tias Little and in the Iyengar Yoga teacher syllabus of Iyengar Yoga Canada, which lists Parivrtta Ardha Chandrasana among the standing poses. Yoga International teaches it under the same name, and the B.K.S. Iyengar Yoga Association of Vancouver has published a prop sequence for it. It is not among the postures of Light on Yoga (1966). The 26+2 series and the Bihar School use “half moon” for different postures (see the half moon page), but neither has a revolved version under this name.

How to make it work

Set the standing leg before you twist. Yoga Journal’s sequence first builds the plain balance: the standing foot parallel to the edge of the mat, the big-toe mound pressing down, the arch lifted and the standing hip drawn in. Only then do both hip points turn to face the floor, with the opposite hand on a block in front of the standing foot. The back leg keeps the toes pointing down and reaches out through the centre of the heel; if that hip drops, lift it level again.

Twist from the length of the spine. Lengthen from tailbone to crown first, then rotate the chest toward the standing-leg side, leaving the pelvis square. Keep the top hand on the hip until the balance holds; reaching the arm up and looking at the hand come last. A slight bend in the standing knee keeps it from locking back. Most people need a block under the bottom hand for a long time, because a tight hamstring pulls the pelvis out of line when the hand reaches for the floor. Yoga International comes in from a lunge instead of triangle: float the back leg up into a modified warrior III with the fingertips on the floor or blocks, keep the back heel at hip height but not higher, which tends to strain the lower back, and start the twist from the back ribs, lifting the top arm only once the shoulders stack.

Precautions in plain words

Do not force the twist. With a lower back or sacroiliac problem, a hamstring injury, or a disc condition, skip the rotation or ask your doctor or physical therapist first. With neck problems, keep the gaze down. People with low blood pressure, dizziness or balance difficulties should stay close to a wall. In pregnancy, deep twists that compress the belly are usually avoided; an open version with the hand on a chair is a gentler option to discuss with your midwife or doctor. This page is general information, not individual advice.

Preparation and next poses

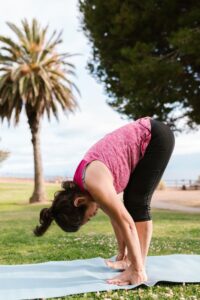
Useful preparation includes revolved triangle for the twist, pyramid pose for the hamstrings, and warrior III and half moon for the balance. Afterward, rest in a standing forward bend and repeat on the second side.

Where it is taught

Revolved half moon appears in Iyengar courses and in many vinyasa classes as a standing peak or a transition from revolved triangle. Explore more standing balances in the pose library.
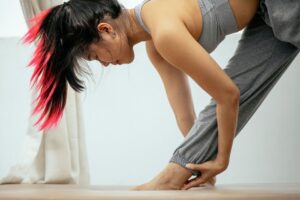
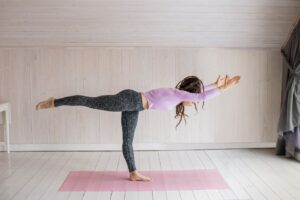
Preparatory poses

Follow-up poses and transitions

Counterposes

Related poses

More balancing poses

Frequently asked questions

What is the difference between half moon and revolved half moon?

In half moon the chest and pelvis open to the side, with the hand on the same side as the standing leg on the floor. In revolved half moon the pelvis faces the floor, the opposite hand is down and the chest turns toward the standing leg.

Is revolved half moon a beginner pose?

No. It combines a one-leg balance, a twist and a hamstring stretch. Build half moon, warrior III and revolved triangle first, and use a block.

Why do I lose my balance when I twist?

Usually the standing leg was not set before the twist, or the lifted hip opened and pulled the pelvis off line. Square the hips first, then rotate the chest.

Sources

  1. Master Class: Revolved Half Moon Pose (Parivrtta Ardha Chandrasana), Tias Little, Yoga Journal (accessed October 6, 2026)
  2. IYAC/ACYI Syllabi for Candidates (February 2018), Iyengar Yoga Association of Canada (accessed October 6, 2026)
  3. Revolved Half Moon (pose page), Yoga International (accessed October 6, 2026)
  4. Home Practice Sequence: Parivrtta Ardha Chandrasana (Nancy Zrymiak), B.K.S. Iyengar Yoga Association of Vancouver (accessed October 6, 2026)
  5. Monier-Williams Sanskrit-English Dictionary: parivṛtta, ardha, candra, Cologne Digital Sanskrit Dictionaries, University of Cologne (accessed October 6, 2026)

Facts checked on October 6, 2026