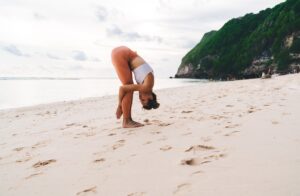
Revolved Triangle (Parivrtta Trikonasana): stance, twist and safe options

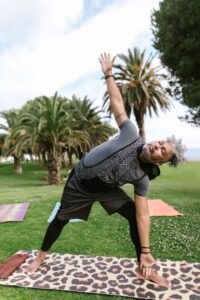
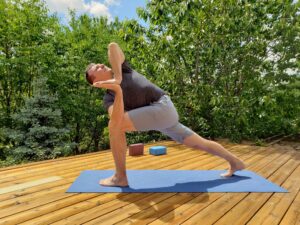
Revolved triangle (Parivrtta Trikonasana) twists over a straight front leg, opposite hand down, top arm up. Harder than triangle: use a block and a slightly wide stance.

Not yet reviewed by a qualified teacher Names and shape checked against 3 sources

Sanskrit name
Parivṛtta Trikoṇāsana परिवृत्त त्रिकोणासन (source)
Also called
Twisted Triangle, Revolved Triangle Pose
Other spellings
Parivrtta Trikonasana, Parivritta Trikonasana, Trikonasana B (Ashtanga)
Pose family
Standing, Twist
Starting position
Standing
Movement
Balance, Forward fold, Twist
Taught in
Hatha Yoga: The Historical Term and the Modern Class, Vinyasa Yoga: Flow, Breath and What to Expect
Difficulty
Intermediate
Prerequisite skills
Comfortable pyramid pose (hamstring length) and a basic standing twist; steady balance.
Body areas
Hamstrings, Hips, Legs, Spine
Props
Block, Chair, Wall
Practised
Solo

Names in different traditions

TraditionName usedNote
Iyengar (Light on Yoga)Parivṛtta TrikoṇāsanaAsana 4, Plates 6–7: back foot 60° in, opposite palm on the floor beside the outer front foot; counter pose to Utthita Trikonasana; about half a minute.
Ashtanga vinyasa (AshtangaYoga.info)Parivṛtta Trikoṇāsana (often called Trikonasana B)Follows Utthita Trikonasana in the standing sequence; back foot clearly turned in and a span to the side; five breaths.

Step by step

Coming into the pose

  1. Stand with the feet about 3 to 3½ feet apart. Turn the right foot out 90 degrees and the left foot well in (about 60 degrees), with the left foot a little to the side of the line of the right foot.
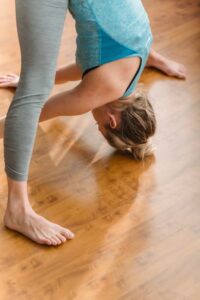
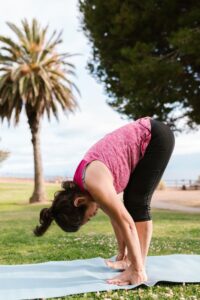
  2. Turn the hips toward the right leg. Inhale and lengthen the spine; exhale and hinge forward over the right leg.

In the pose

  1. Bring the left hand to a block, the shin or the floor beside the right foot. Turn the belly and chest to the right.
  2. Stretch the right arm up in line with the left. Keep both legs straight but not locked; press the outer edge of the left foot down.
  3. Spread the twist through the middle and upper back; look up at the right thumb, or down if the neck prefers. Stay five breaths or about half a minute.

Coming out

  1. Look down, inhale and lift the trunk back to upright; turn the feet and repeat on the other side.

Breathing

Inhale to lengthen, exhale to turn. Hold with steady breaths; inhale to come up.

Alignment cues

  • Back foot turned well in and slightly to the side of the front foot’s line.
  • Hinge forward with a long spine before twisting.
  • Twist from the belly and chest; the neck follows last.
  • Both legs straight but not locked; outer back foot grounded.

Common alignment errors

  • Feet on one line, so the hips cannot turn and balance is lost.
  • Rounding the back to reach the floor.
  • Twisting mainly from the neck.
  • Front hip swinging out to the side.

Modifications and easier variations

  • Shorter stance, lower hand on the shin, top hand on the hip. none

Advanced variations

Props and chair adaptations

  • Lower hand on a block inside or outside the front foot. block
  • Press the back heel against a wall for a stable base. wall
  • Lower hand on the seat of a chair placed in front of the front foot. chair

Precautions

  • Neck problems: look down.
  • Hamstring injury or sacroiliac problems: skip or use a short, supported version (Yoga Journal).
  • Pregnancy: listed by Yoga Journal as a contraindication; ask your teacher for an alternative.
  • Back or disc problems: keep the twist small.

Learn it with a teacher: A teacher is useful for the stance and for keeping the twist out of the neck and lower back; recommended with sacroiliac, disc or neck problems.

General information, not medical advice. Poses do not cure illness. If you are pregnant, injured or have a health condition, check with your doctor and tell your teacher before you practise.

In short: revolved triangle is a standing twist over a straight front leg: the opposite hand comes down beside the front foot (or onto a block), the chest turns toward the front leg and the top arm reaches up. It combines a hamstring stretch, a spinal twist and a balance challenge, which makes it noticeably harder than ordinary triangle. Use a block, keep the stance a little wide from side to side, and twist from the chest, not the neck.

Below we explain the name and how it relates to triangle, the stance that makes the twist possible, the precautions and where the pose is taught.

The name

The Sanskrit name is Parivṛtta Trikoṇāsana. Light on Yoga glosses parivṛtta as revolved, turned round or back, and trikoṇa as triangle, and calls it a counter pose to extended triangle. B.K.S. Iyengar rates it Five*, harder than triangle’s Three*. In the Ashtanga standing sequence it follows extended triangle on both sides and is sometimes called Trikonasana B; AshtangaYoga.info uses the name Parivṛtta Trikoṇāsana.

Making the twist work

The stance is different from extended triangle. The back foot turns in much more (Iyengar gives 60 degrees) so that the pelvis can turn toward the front leg, and AshtangaYoga.info places the back foot about a hand-span to the side of the line of the front foot, which gives a steadier, slightly wider base. On one narrow line the hips cannot turn and the balance goes.

Before you twist, hinge forward from the hips with a long spine. Then bring the opposite hand down: to a block on the inside or outside of the front foot, to the shin, or, as in Light on Yoga, to the floor beside the outer edge of the front foot. Turn the belly and chest toward the front leg and stretch the top arm up in line with the lower one. Keep both legs straight but not locked and press the outer edge of the back foot down. Yoga Journal points out that most of us twist where it is easy, usually the neck: spread the twist through the middle and upper back, and look down if turning the head is uncomfortable. Iyengar suggests about half a minute; Ashtanga stays five breaths.

Learning the twist in three stages

Yoga Journal’s how-to article teaches the pose in steps, and the same order works well at home. The idea behind all three is to stop the hips from “swiveling” so the turn happens in the middle and upper back, not in the pelvis or the sacroiliac joint.

  • Wide-legged version with a block. Face the long side of the mat, feet parallel and about four feet apart, a block between and slightly in front of the feet. Fold forward until the torso is parallel to the floor and put one hand on the block under your nose. Rest the other hand on your sacrum (the flat bone at the base of the spine) and keep it level as you turn the chest and then lift the top arm. If the sacrum tips, the hips are doing the twisting.
  • Back heel at a wall. Stand with the back heel against a wall, back toes turned out about 45 degrees, and step the front foot forward. Square the hips, press the back thighbone back and place the hand on a block under the shoulder. If you cannot square the hips, shorten the stance.
  • The classical pose. Keep the same foot distance in the middle of the room, legs active, and lengthen forward before the hand goes to the floor or block outside the front foot.

Breath does a lot of the work here. The article suggests a rhythm in which each inhalation makes the spine a little longer and each exhalation adds a little more rotation. Keep the chin in line with the breastbone while you turn, and only turn the head once the chest has turned. If you feel more in your neck than in your upper back, drop the gaze and look straight ahead. In the first stage the article holds for 8 to 10 breaths on each side.

Precautions in plain words

Yoga Journal lists neck vulnerability, hamstring injury, sacroiliac problems and pregnancy as reasons for caution. With any of these, skip the pose or use a gentle supported twist with a block and a short stance, and ask your teacher. With back or disc problems, keep the twist small. If balance is uncertain, practise with the back heel against a wall.

Preparation and what comes next

Prepare with pyramid pose (same feet, no twist), triangle and gentler twists such as revolved lunge with the back knee down. Afterwards, wide-legged forward fold or standing forward fold lets the spine rest. Revolved side angle and revolved half moon are the next steps in the same family.

Where it is taught

Revolved triangle is in Iyengar yoga, the Ashtanga standing sequence and many hatha and vinyasa classes.

Preparatory poses

Follow-up poses and transitions

Counterposes

Related poses

More standing poses

Frequently asked questions

Why is revolved triangle so hard to balance?

Usually because the feet are on one narrow line. Turn the back foot well in and step it a little to the side so the hips can turn toward the front leg.

Where should my lower hand go?

Wherever the spine stays long: a block, the shin, or the floor beside the front foot.

Is revolved triangle the same as Trikonasana B?

In Ashtanga, yes: it follows extended triangle (A) in the standing sequence.

Sources

  1. B.K.S. Iyengar, Light on Yoga: asana 4, Parivrtta Trikonasana, Plates 6–7, Internet Archive (Digital Library of India copy) (accessed October 6, 2026)
  2. Parivṛtta Trikoṇāsana (standing sequence), AshtangaYoga.info (Dr. Ronald Steiner) (accessed October 6, 2026)
  3. Mind-Body Challenge: Parivrtta Trikonasana (Revolved Triangle Pose), Yoga Journal (accessed October 6, 2026)

Facts checked on October 6, 2026