Revolved Side Angle (Parivrtta Parsvakonasana): the twisting lunge, step by step

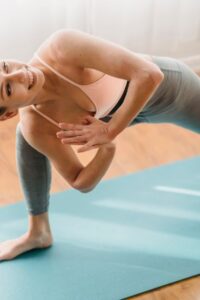
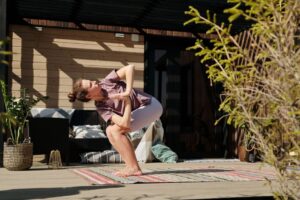
Revolved side angle (Parivrtta Parsvakonasana) twists from a deep lunge with the opposite arm outside the front knee. An intense twist: start with prayer hands and the back knee down.

Not yet reviewed by a qualified teacher Names and shape checked against 2 sources

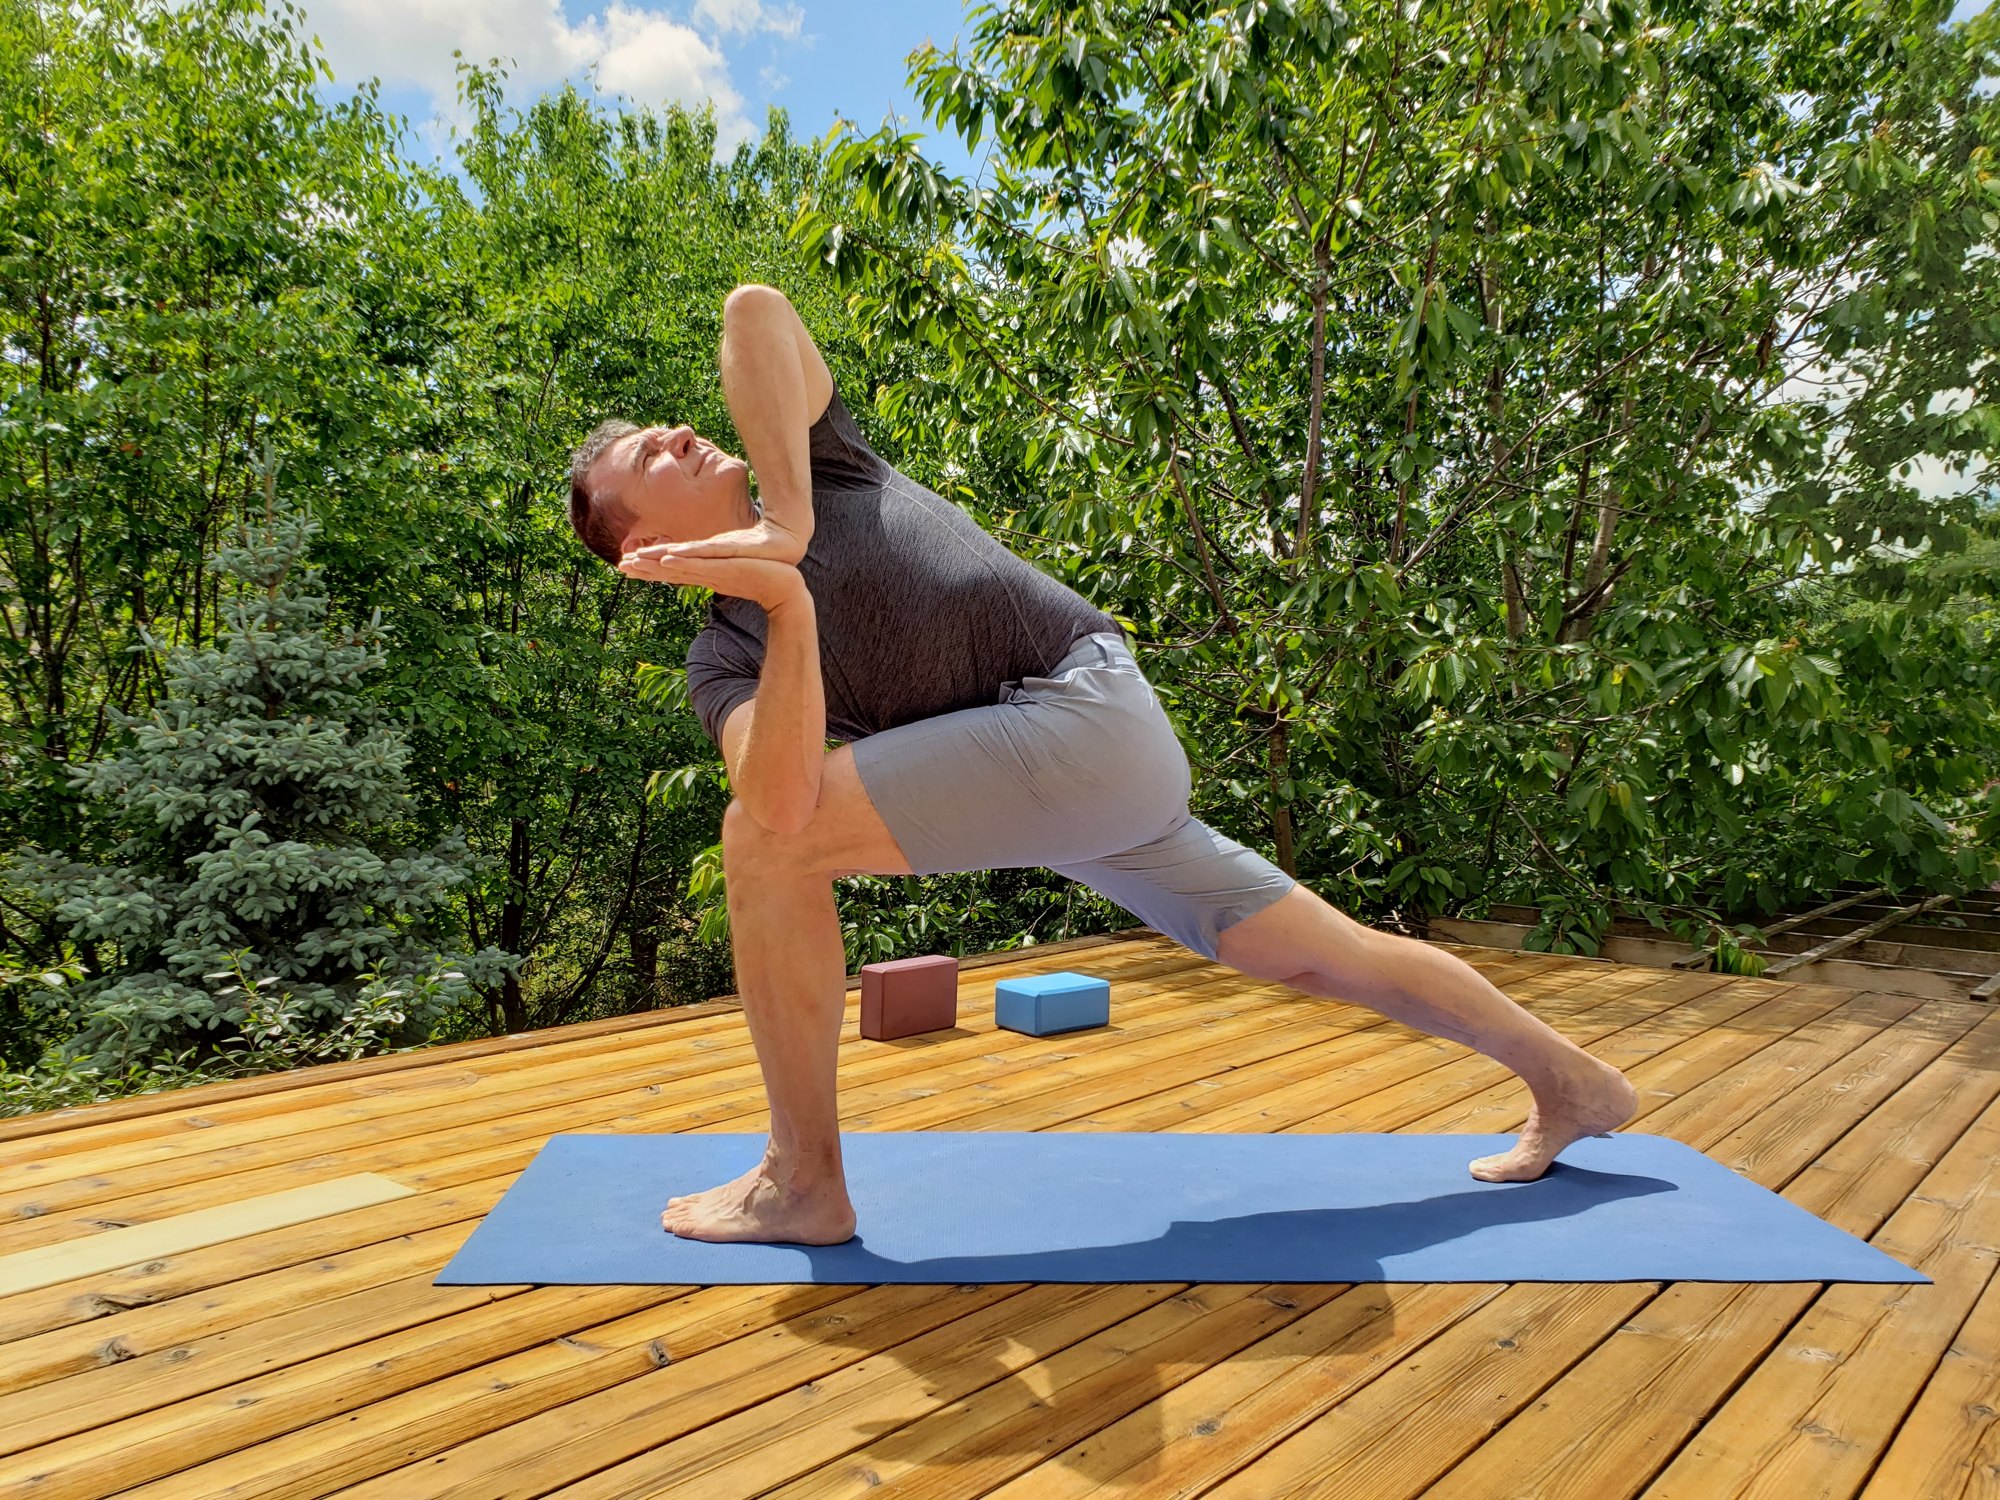
Revolved side angle with prayer hands on a garden deck
Sanskrit name
Parivṛtta Pārśvakoṇāsana परिवृत्त पार्श्वकोणासन (source)
Pronunciation
par-ee-VRT-tah parsh-vah-cone-AHS-anna (source)
Also called
Twisted Side Angle, Revolved Side Angle Pose
Other spellings
Parivrtta Parsvakonasana, Parivritta Parshvakonasana, Parsvakonasana B (Ashtanga)
Pose family
Standing, Twist
Starting position
Standing
Movement
Balance, Strength hold, Twist
Taught in
Vinyasa Yoga: Flow, Breath and What to Expect, Hatha Yoga: The Historical Term and the Modern Class
Difficulty
Intermediate
Prerequisite skills
A strong lunge with the front knee at a right angle, and a comfortable gentle twist (revolved lunge or revolved chair).
Body areas
Core, Hips, Legs, Shoulders, Spine
Props
Blanket, Block, Chair
Practised
Solo

Names in different traditions

TraditionName usedNote
Iyengar (Light on Yoga)Parivṛtta PārśvakoṇāsanaAsana 6, Plates 10–11: wide stance, back foot 60° in, armpit over the outer front knee, palm on the floor outside the front foot, top arm over the ear; half a minute to a minute. Rated Eight*.
Yoga JournalParivrtta ParsvakonasanaFrom a lunge/warrior I: palms together, elbow outside the knee, then hand to floor or block; 5–10 breaths. Notes it is part of the Ashtanga standing sequence.

Step by step

Coming into the pose

  1. From downward-facing dog, step the left foot forward into a lunge, knee at a right angle over the ankle; or set up a wide stance with the back foot turned well in.
  2. Rise into warrior I, reach up and lengthen. Then bring the palms together, thumbs at the breastbone.

In the pose

  1. Exhale, twist to the left and hook the right elbow outside the left knee. Press elbow and knee into each other.
  2. Inhale to lengthen the spine, exhale to turn a little more. Keep the back leg straight and work the back heel toward the floor.
  3. When steady, take the right hand to a block or the floor outside the left foot and reach the left arm up or over the ear. Hold 5 to 10 breaths, or half a minute to a minute.

Coming out

  1. Inhale and lift the trunk, exhale and release the twist; step back to downward dog or turn the feet and repeat on the other side.

Breathing

Inhale to lengthen the spine, exhale to deepen the twist. Breathe deeply and evenly through the hold; inhale to come up.

Alignment cues

  • Front knee at a right angle, over the ankle.
  • Back leg straight and active.
  • Lengthen first, then turn; the twist spreads through the whole spine.
  • Lower arm and outer knee press into each other.

Common alignment errors

  • Collapsing the chest onto the front thigh.
  • Front knee drifting inward under the pressure of the arm.
  • Twisting from the neck only.
  • Bending the back knee without meaning to.

Modifications and easier variations

  • Back knee down on a blanket, palms together at the chest. blanket
  • Back heel lifted, as in a high lunge, if keeping it down strains the knee or ankle. none

Advanced variations

Props and chair adaptations

  • Block inside the front foot for the lower hand; top hand on the heart or hip (Yoga Journal). block
  • Seated twist on a chair: sit sideways, back leg extended behind, and turn the chest toward the front thigh. chair

Precautions

  • Neck problems: look straight ahead or down (Yoga Journal).
  • Headache, high or low blood pressure, insomnia: Yoga Journal suggests you may want to avoid it.
  • Back or disc problems: keep the twist small.
  • Knee problems: back knee down.
  • Pregnancy: closed twists are usually avoided; ask your teacher for an alternative.

Learn it with a teacher: Learn the full version with a teacher, especially the floor-hand form Light on Yoga rates as difficult, or if you have back, neck or blood-pressure issues.

General information, not medical advice. Poses do not cure illness. If you are pregnant, injured or have a health condition, check with your doctor and tell your teacher before you practise.

In short: revolved side angle is a deep lunge with a twist: the front knee bends to a right angle, the opposite elbow or arm hooks outside the front knee, and the chest turns toward the ceiling. It is an intense twist that asks for strength, balance and flexibility at the same time. Start with the palms together and the back knee down or a block under the hand, and build up slowly.

Below we explain the name, the two main ways it is taught, the cues that make the twist work, the precautions and where it fits.

The name

The Sanskrit name is Parivṛtta Pārśvakoṇāsana: parivṛtta means revolved, pārśva side and koṇa angle. Light on Yoga rates it Eight*, twice the difficulty of extended side angle, which tells you how demanding the full version is. It is part of the Ashtanga standing sequence (sometimes called Parsvakonasana B there) and appears in many vinyasa and hatha classes.

Two ways in, and how to twist

Light on Yoga enters from a wide stance (4 to 4½ feet) facing the side, turns the back foot 60 degrees in, bends the front knee to a right angle and brings the opposite armpit over the outer front knee with the palm on the floor outside the front foot, top arm over the ear. Yoga Journal teaches a lunge-based entry: step forward from downward dog, rise into warrior I, bring the palms together at the breastbone, then twist and hook the opposite elbow outside the front knee, working toward the back heel on the floor.

Either way, lengthen first and twist second. With the palms together, press the lower elbow into the outer knee and the knee back into the elbow, and use each inhalation to lengthen the spine and each exhalation to turn a little further, as Yoga Journal describes. Keep the front knee over the ankle and the back leg straight and strong. Only when the twist is comfortable does the lower hand go down to a block or the floor and the top arm reach over the ear. Iyengar gives half a minute to a minute; Yoga Journal 5 to 10 breaths.

Props and steps on the way to the full pose

Balance is the first hurdle for most people, especially with the back heel lifted. Yoga Journal’s teaching tips offer several ways to make the pose steadier, and you can move through them one at a time as the twist becomes familiar.

  • Back knee down. Rest the back knee on the mat or a folded blanket. Keep the front knee stacked over the front ankle and the hip points level and facing forward.
  • A block inside the front foot. Place a block on the inside of the bent front leg and, as you twist, put the lower hand on it. The other hand can rest on your heart or hip instead of reaching up.
  • A chair. Rest the lower hand on the back or the seat of a chair as you turn. Placing the top hand on the sacrum reminds you to keep the hips level and facing forward.
  • Support for the back heel. If the heel will not reach the floor, stand it on a sandbag or a thick book, or brace it against a wall. When the heel can stay down, turn the back foot in more than in most standing poses, about 45 to 60 degrees.

One more honest note. You will often hear that twists “wring out toxins” or detox the organs. In the same Yoga Journal article, functional-medicine doctor Eric Grasser points out that there is no scientific research showing that twisting poses improve liver or lymphatic function. Practice it for what it plainly does: it strengthens and stretches the legs, works the spine through rotation and asks for steady breathing under effort. If you notice you are holding your breath, back off until the breath flows again.

Precautions in plain words

Yoga Journal advises that if you have neck problems you should not turn the head to look up, but look straight ahead or down, and that you may want to avoid the pose with a headache, high or low blood pressure or insomnia. With back or disc problems, keep the twist small or choose a gentler twist. With knee problems, use the back-knee-down version. Closed twists that compress the belly are usually avoided in pregnancy; ask your teacher for an alternative.

Preparation and what comes next

Prepare with revolved lunge (back knee down), revolved chair and extended side angle. Afterwards, downward-facing dog or wide-legged forward fold let the spine unwind. The pose is a step toward twisting arm balances such as side crow.

Yoga Journal also lists half lord of the fishes as a preparatory pose: a seated twist with no balance to manage, so you can learn the rotation of the spine first.

Where it is taught

Revolved side angle is in Iyengar yoga, the Ashtanga standing sequence and many vinyasa, power and hatha classes.
Preparatory poses

Follow-up poses and transitions

Counterposes

Related poses

More standing poses

Frequently asked questions

What is the easiest version of revolved side angle?

Back knee down on a blanket and palms together at the chest, with the elbow hooked outside the front knee.

Should my back heel be down?

Light on Yoga’s version has the back foot flat; Yoga Journal says to work toward it. Lifting the heel is fine while you learn.

How long should I hold it?

Light on Yoga gives half a minute to a minute; Yoga Journal 5 to 10 breaths.

Sources

  1. B.K.S. Iyengar, Light on Yoga: asana 6, Parivrtta Parsvakonasana, Plates 10–11, Internet Archive (Digital Library of India copy) (accessed October 6, 2026)
  2. Revolved Side Angle Pose: How to Do Parivrtta Parsvakonasana, Yoga Journal (accessed October 6, 2026)

Facts checked on October 6, 2026