Pyramid Pose (Parsvottanasana): forward fold over the front leg, hands on blocks first

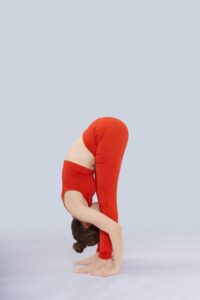
Pyramid pose (Parsvottanasana) folds over a straight front leg from a short staggered stance. Start with hands on blocks; reverse prayer behind the back is the traditional option.

Not yet reviewed by a qualified teacher Names and shape checked against 3 sources

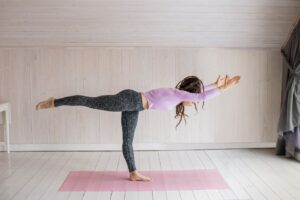
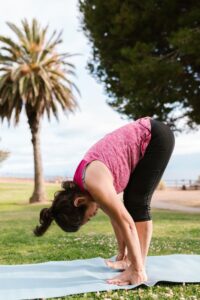
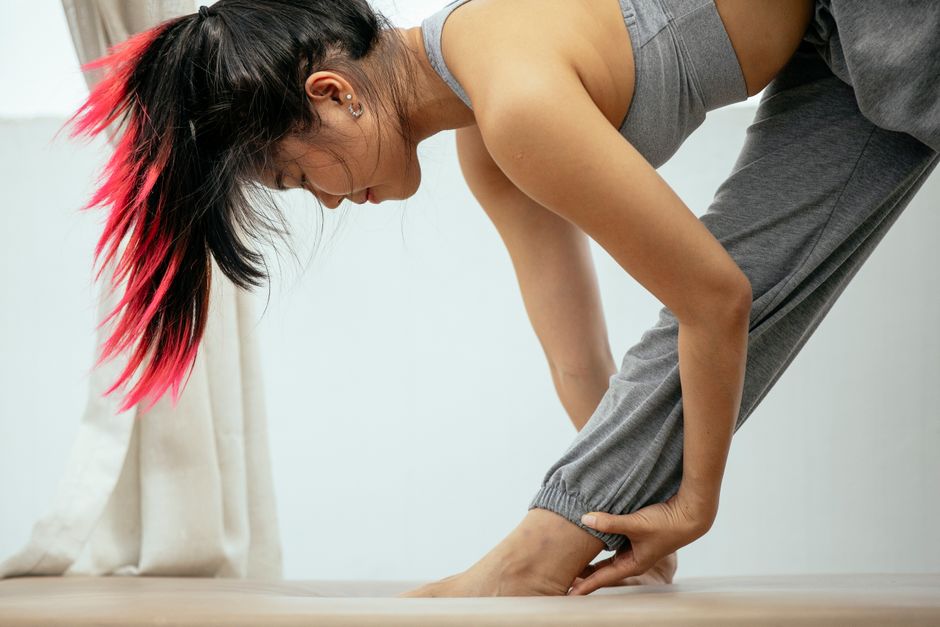
Side view ground level of peaceful ethnic female with pink hair practicing yoga in Parsvottanasana while stretching legs on terrace
Sanskrit name
Pārśvottānāsana पार्श्वोत्तानासन (source)
Pronunciation
parsh-voh-tahn-AHS-anna (source)
Also called
Intense Side Stretch, Intense Side Stretch Pose, Pyramid
Other spellings
Parsvottanasana, Parshvottanasana
Pose family
Forward bend, Standing
Starting position
Standing
Movement
Balance, Forward fold
Taught in
Hatha Yoga: The Historical Term and the Modern Class, Vinyasa Yoga: Flow, Breath and What to Expect
Difficulty
Beginner
Prerequisite skills
Some hamstring length (blocks make up the rest) and steady balance in a short staggered stance.
Body areas
Hamstrings, Hips, Shoulders, Spine
Props
Block, Chair, Wall
Practised
Solo

Names in different traditions

TraditionName usedNote
Iyengar (Light on Yoga)PārśvottānāsanaAsana 12, Plates 24–26: palms joined behind the back ("namaste"); legs 3–3½ ft apart; back foot 75–80° in; head to the front knee; 20 seconds to half a minute.
Ashtanga vinyasa (AshtangaYoga.info)PārśvottānāsanaStanding sequence: reverse prayer; step about an arm’s length, heels about hip-width; chin toward the shin; five breaths each side.
Yoga JournalPyramid Pose (Parsvottanasana), also Intense Side StretchBack foot 30–45°, 2–4 ft back; hands behind the back or on blocks/shin.

Step by step

Coming into the pose

  1. Stand in mountain pose with the hands on the hips. Place two blocks either side of where your front foot will be.
  2. Step the right foot back 2 to 4 feet (about an arm’s length), heels roughly hip-width apart, back foot turned in about 30 to 45 degrees.
  3. Draw the left hip back so the hips face forward. Keep the hands on the hips, take them into reverse prayer, or hold the elbows behind the back.

In the pose

  1. Inhale, lengthen the spine and firm the thighs. Exhale and hinge from the hips over the left leg, breastbone reaching forward.
  2. Rest the hands on the blocks or shin if they are free, and let the head come toward the shin only as far as the back stays long. Hold five breaths to half a minute.

Coming out

  1. Inhale and come up using the strength of the legs; step the feet together and repeat on the other side.

Breathing

Inhale to lengthen, exhale to fold. Hold with steady breaths; inhale to come up slowly.

Alignment cues

  • Short stance, heels about hip-width apart.
  • Front-leg hip drawn back so the hips face forward.
  • Fold from the hips, breastbone forward, back long.
  • Legs straight but not locked; all four corners of both feet grounded.

Common alignment errors

  • Stance too long or on one narrow line.
  • Rounding the back to reach the floor.
  • Hyperextending the front knee.
  • Front hip swinging forward and out.

Modifications and easier variations

  • Hold the opposite elbows behind the back instead of reverse prayer. none

Advanced variations

Props and chair adaptations

  • Hands on blocks at any height either side of the front foot. block
  • Start with the back to a wall and step forward, keeping the back heel near the wall as a touch point (Yoga Journal). wall
  • Hands on the seat of a chair in front of the front foot, folding only to a flat back. chair

Precautions

  • Hyperextending knees: keep a micro-bend.
  • Hamstring injury, lower back or disc problems: hands on high blocks, flat-back half fold only.
  • Head below the heart: with blood-pressure problems, glaucoma or dizziness keep the head above the hips and come up slowly.
  • Wrist or shoulder pain: skip the reverse prayer.

Learn it with a teacher: You can learn it with blocks on your own. Ask a teacher before adding reverse prayer if your shoulders or wrists are sensitive.

General information, not medical advice. Poses do not cure illness. If you are pregnant, injured or have a health condition, check with your doctor and tell your teacher before you practise.

In short: pyramid pose is a forward fold over a straight front leg from a short, staggered stance, with both legs straight and the hips facing forward. It stretches the hamstrings and the back of the hips and asks for steady balance. Traditional versions join the palms behind the back; start with the hands on blocks, fold from the hips with a long spine, and keep the knees from locking.

Pyramid is a quieter pose than the warriors but very revealing: tight hamstrings show at once, and so does a stance that is too long or too narrow. Below we explain the name, how to set your feet, the cues for a good fold, the precautions and where the pose leads.

The name

The Sanskrit name is Pārśvottānāsana: pārśva means side or flank and uttāna an intense stretch, so the name in Light on Yoga is the pose in which the side of the chest is stretched intensely. In English it is usually called pyramid pose or intense side stretch pose. B.K.S. Iyengar teaches it with the palms joined behind the back in a “namaste” at the level of the shoulder blades, and the Ashtanga standing sequence uses the same reverse-prayer hands.

Making pyramid work

The stance is shorter than in the warriors. Yoga Journal suggests stepping the back foot 2 to 4 feet back, with the back foot turned in about 30 to 45 degrees; AshtangaYoga.info describes a step of about one arm’s length, heels roughly hip-width apart so the pelvis can turn toward the front. Yoga Journal’s beginner tip is that most people take too wide a stance: bring the feet closer and the fold becomes easier and steadier.

Square the hips as far as is comfortable by drawing the front-leg hip back. Inhale to lengthen the spine and firm the thighs; exhale and hinge from the hips, reaching the breastbone forward before letting the head come down toward the shin. Put the hands on blocks or the shin rather than rounding the back to reach the floor. Reverse prayer, or simply holding the elbows behind the back, is an extra shoulder stretch, not a requirement. Iyengar gives 20 seconds to half a minute; Ashtanga five breaths.

The arms, step by step

The arm position is the part people find hardest, so it helps to know the options. In Yoga Journal’s version you spread the arms out to the sides on an inhale, then on the exhale roll the arms inward, bend the elbows and bring the palms together behind the back. If the palms will not meet, Light on Yoga says to simply hold one wrist with the other hand behind the back and follow the same steps. If even that strains the shoulders, leave the hands beside the front foot, on blocks or on the shin. While you fold, draw the tops of the upper arms back and up, away from the floor, so the chest stays open.

Steadiness from the feet

Yoga Journal’s teachers describe pyramid as a balance between a free upper body and a stable base. Press down through all four corners of both feet. In the back foot, root the big toe and the inner heel, which helps the hips stay level instead of one side lifting. Keep a soft bend in the knees and let the muscles of the legs, hips and belly hold you up, so the ligaments behind the knees are not doing the work. If balance is shaky, stand with your back to a wall, step one foot forward and fold; the wall gives you a touch point behind you.

Iyengar’s full version includes a short backbend first: with the hands in reverse prayer, you turn toward the front leg and take the head back before folding. He also moves from side to side without standing up, swinging the trunk around the hips. Most classes keep it simpler: fold, hold, come up, change sides. To come up, inhale and use the strength of the legs rather than the lower back. Pyramid is in the very first weeks of the beginners’ course in Light on Yoga, so it is a good pose to learn early.

Precautions in plain words

Do not lock or push back the knees; keep a micro-bend if they hyperextend. With a hamstring injury, a lower back or disc problem, keep the hands on high blocks and fold only partway with a flat back. The head goes below the heart in the full fold: if you have blood-pressure problems, glaucoma or get dizzy, keep the head above the hips and come up slowly. With wrist or shoulder pain, skip the reverse prayer.

Preparation and what comes next

Prepare with half standing forward fold, downward-facing dog and low lunge. Pyramid has the same feet as revolved triangle, so it is the natural step before that twist, and it is a good preparation for warrior III and half split.

Where it is taught

Pyramid is in Iyengar yoga, the Ashtanga standing sequence and many hatha and vinyasa classes.
Preparatory poses

Follow-up poses and transitions

Counterposes

Related poses

More forward bend poses

Frequently asked questions

What does Parsvottanasana mean?

Pārśva means side or flank and uttāna an intense stretch: the intense side stretch pose. In English it is usually called pyramid pose.

Do I have to do reverse prayer?

No. It is the traditional arm position in Iyengar and Ashtanga, but blocks under the hands or holding the elbows behind the back are fine.

How wide should my stance be?

Shorter than in the warriors: about an arm’s length from front to back, with the heels roughly hip-width apart.

Sources

  1. B.K.S. Iyengar, Light on Yoga: asana 12, Parsvottanasana, Plates 24–26, Internet Archive (Digital Library of India copy) (accessed October 6, 2026)
  2. Pyramid Pose: How to Practice Parsvottanasana, Yoga Journal (accessed October 6, 2026)
  3. Pārśvottānāsana (standing sequence), AshtangaYoga.info (Dr. Ronald Steiner) (accessed October 6, 2026)

Facts checked on October 6, 2026