Supported Headstand (Salamba Sirsasana): build-up, precautions and variations

Supported headstand (Salamba Sirsasana) balances the body upside down on the forearms and the crown of the head. An advanced inversion to learn step by step with a teacher; with named variations.

Not yet reviewed by a qualified teacher Names and shape checked against 7 sources

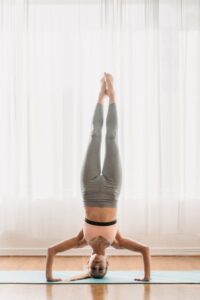
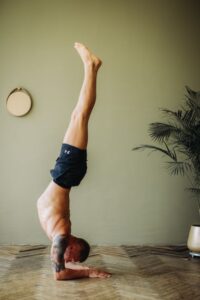
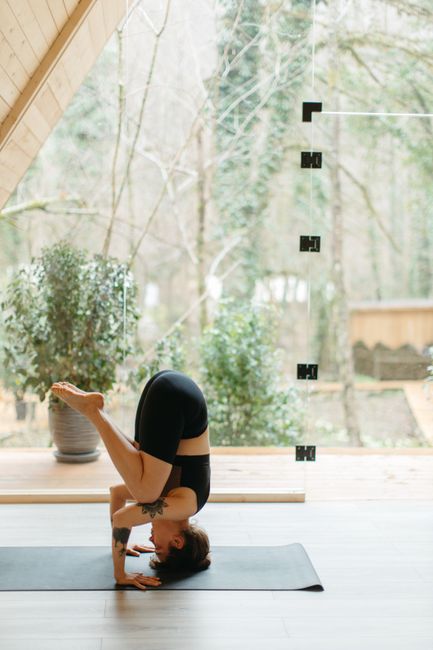
Adult woman in black activewear performing a headstand yoga pose indoors on a mat.
Sanskrit name
Sālamba Śīrṣāsana सालम्ब शीर्षासन (source)
Pronunciation
sah-LOM-bah shear-SHAHS-ah-nah (source)
Also called
Headstand, King of Asanas
Other spellings
Sirsasana, Sirshasana, Shirshasana, Salamba Sirsasana, Salamba Sirsasana I, Śīrṣāsana, Parsva Sirsasana, Mukta Hasta Sirsasana, Baddha Hasta Sirsasana
Pose family
Inversion
Starting position
Hands-supported
Movement
Inversion
Taught in
Hatha Yoga: The Historical Term and the Modern Class
Difficulty
Advanced
Prerequisite skills
A strong dolphin pose held for a minute, forearm plank, core strength, a healthy neck, and a teacher to check the set-up.
Body areas
Arms and wrists, Core, Neck, Shoulders
Props
Blanket, Mat, Wall
Practised
Solo

Names in different traditions

TraditionName usedNote
Sivananda (Swami Vishnudevananda)Śīrṣāsana (Headstand)First of the 12 basic asanas; elbows-and-hands triangle base, half headstand first, build from 5 seconds (Sivananda Ashram Yoga Ranch).
Iyengar (Light on Yoga)Sālamba Śīrṣāsana IPlates 184–190; variations pl. 198–218 (Iyengar Yoga UK I8 Teaching Syllabi).
Ashtanga vinyasa (Pattabhi Jois lineage)Śīrṣāsana A (and B)Finishing sequence; B lowers the legs to horizontal for ten breaths, also called Ūrdhva Daṇḍāsana (AshtangaYoga.info).

Step by step

Coming into the pose

  1. Kneel. Hold each elbow with the opposite hand and place the forearms on the floor, elbows shoulder-width apart.
  2. Without moving the elbows, interlace the fingers in front, tucking the bottom little finger in. This triangle is your base.
  3. Place the crown of the head on the floor with the back of the head against the palms. Press the forearms down so the head carries little weight.
  4. Tuck the toes, straighten the legs and walk the feet in until the hips are above the shoulders.

In the pose

  1. Bend the knees and lift the feet with control, knees to the chest; do not jump or kick. Hold this half headstand until steady.
  2. Open the hips so the bent knees point up, then straighten the legs. Shoulders lift away from the ears; legs together. Start with about 10 seconds (Yoga Journal) or 5 seconds (Sivananda) and build slowly.

Coming out

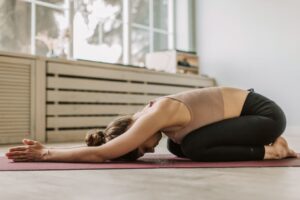
  1. Bend the knees, lower them to the chest and bring the feet down with control. Rest in child’s pose for at least a minute before lifting the head.

Breathing

Smooth, rhythmic breathing through the nose. If the breath becomes strained or you feel pressure in the head, face or eyes, come down.

Alignment cues

  • Elbows no wider than the shoulders; they stay put throughout.
  • Press the forearms down and lift the shoulders away from the ears.
  • Crown of the head on the floor, neck long and neutral.
  • Legs together and active, ankles over the hips.

Common alignment errors

  • Kicking or jumping up instead of lifting with control.
  • Elbows sliding wider than the shoulders.
  • Sinking the weight into the head and neck.
  • Lifting the head straight after coming down.

Modifications and easier variations

  • Stay in dolphin pose and walk the feet in, without lifting. none
  • Half headstand with the knees tucked to the chest. none

Advanced variations

Props and chair adaptations

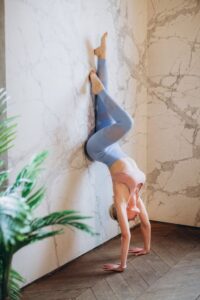
  • Set up with the hands a few inches from a wall or in a doorway for support while learning. wall
  • A folded mat or thin, firm blanket under the head and forearms on a hard floor. blanket

Precautions

  • High or low blood pressure: do not practise (Sivananda Ashram Yoga Ranch).
  • Glaucoma, detached retina or recent eye surgery: do not practise.
  • Recent neck injury or neck pain: do not practise.
  • Heart conditions, history of stroke or spinal osteoporosis: avoid.
  • Pregnancy: do not start learning headstand; experienced practitioners should ask their provider.
  • Come out at once if you feel increased pressure on the head or neck.

Learn it with a teacher: Learn headstand only under the supervision of a teacher who knows your practice (Yoga Journal); have them check your base and your lift before you practise alone.

General information, not medical advice. Poses do not cure illness. If you are pregnant, injured or have a health condition, check with your doctor and tell your teacher before you practise.

In short: in supported headstand the forearms rest on the floor with the fingers interlaced around the back of the head, the crown of the head touches the floor, and the body rises straight up above it. The forearms and shoulders carry the weight, not the neck. It is an advanced inversion: learn it step by step, ideally with a teacher, and skip it if any of the precautions below apply to you.

Headstand is often called the king of asanas. In the Sivananda tradition it opens the sequence of 12 basic postures; in Ashtanga it closes the practice in the finishing sequence; in Iyengar yoga it is studied in great detail with many variations. Most schools agree on one thing: build it slowly and never kick up into it.

The name

Śīrṣa means head, and sālamba means with support, so Sālamba Śīrṣāsana is the supported headstand. The support is the forearm-and-hands base; it distinguishes this pose from tripod headstand (Sālamba Śīrṣāsana II), where the palms are on the floor, and from the free-hand headstands of advanced practice. The Iyengar Yoga (UK) syllabus lists Sālamba Śīrṣāsana I at plates 184 to 190 of Light on Yoga. Swami Sivananda calls it the king of all asanas, and AshtangaYoga.info calls it one of the best-known postures of yoga.

Making the pose work

The base comes first. The Sivananda Ashram Yoga Ranch has you kneel, hold each elbow with the opposite hand to set the elbows shoulder-width apart, then interlace the fingers in front without moving the elbows, making a triangle with equal weight on all three points. The top of the head goes on the floor with the back of the head cupped by the hands. Yoga Journal adds: tuck the bottom little finger in so the outer edges of the hands are stable, and press down through the forearms so that the head carries very little weight.

Then lift in stages. Straighten the legs into a dolphin-like shape and walk the feet in until the hips are over the shoulders. Bring the knees to the chest with control, using the abdominal and back muscles; both sources warn against jumping or kicking up. Hold the tucked half headstand until it is steady, then open the hips so the bent knees point up, and only then straighten the legs. If at any point you feel more pressure on the head and neck, come out at once. Yoga Journal suggests starting with about 10 seconds and adding 5 to 10 seconds at a time; the Sivananda Ranch starts at 5 seconds and builds over time toward several minutes. Come down the same way, slowly, and rest in child’s pose for at least a minute before lifting the head.
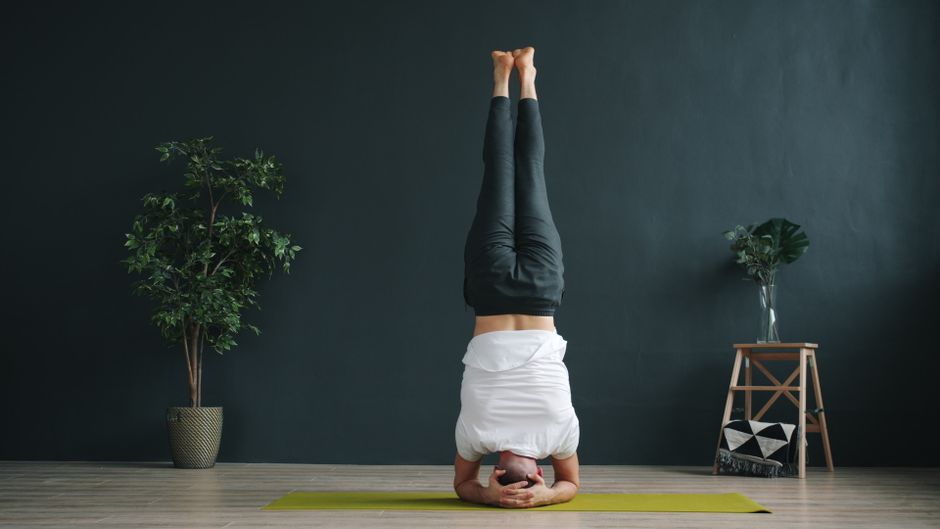
An adult performing a headstand yoga pose on a mat indoors, with plants in the background.

Precautions in plain words

The Sivananda Ashram Yoga Ranch advises not practising headstand with high or low blood pressure, glaucoma or recent eye surgery, or a recent neck injury. Also avoid it with a detached retina, heart conditions, a history of stroke, osteoporosis of the spine, or neck pain, and do not start learning it during pregnancy. Yoga Journal recommends practising this inversion only under the careful supervision of a teacher who knows your practice, and avoiding it when you are stressed, short of sleep or tired. Use a wall while learning, a folded mat or thin blanket under the head if the floor is hard, and never let anyone push you up. This page is general information, not individual advice.

Headstand variations

Once the basic headstand is steady for several minutes, the traditions build on it. These are named here briefly with their sources; none has its own page yet.

  • Pārśva Śīrṣāsana (side headstand): the trunk and legs twist to one side; Light on Yoga plates 202 to 203.
  • Eka Pāda Śīrṣāsana (one leg lowered): one leg comes down toward the floor in front while the other stays vertical; plates 208 to 209. Not to be confused with the leg-behind-the-head pose of the same name.
  • Pārśvaika Pāda Śīrṣāsana: one leg lowered out to the side; plate 210.
  • Ūrdhva Padmāsana in Śīrṣāsana: lotus legs in headstand; plate 211. Piṇḍāsana in Śīrṣāsana: the lotus folded down toward the chest; plate 218.
  • Baddha Hasta and Mukta Hasta Śīrṣāsana: headstands with the arms bound or with the hands free on the floor; plates 198 and 200 to 201. Ashtanga’s intermediate series has versions A to D of the bound-hands and A to C of the free-hands headstand.
  • Ashtanga Śīrṣāsana B (also called Ūrdhva Daṇḍāsana): from headstand the straight legs lower to horizontal and stay there for ten breaths before going back up (AshtangaYoga.info).

Plate numbers are those listed in the Iyengar Yoga (UK) teaching syllabus. All of these are for experienced practitioners with a teacher.

Preparation and what comes next

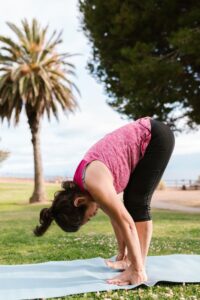
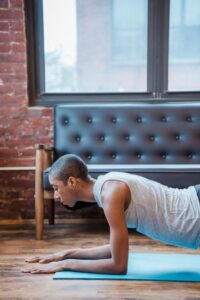
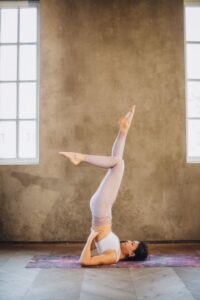
Prepare with dolphin pose, downward dog, plank and forearm plank and standing forward bend; the Sivananda Ranch suggests starting with dolphin and progressing over time. Our headstand preparation plan lays out the stages. After headstand, rest in child’s pose. Many schools pair it with shoulderstand; schools differ on which comes first. Headstand is also the launch pad for advanced arm balances in Ashtanga’s third series, which start from tripod headstand.

You will meet headstand in Sivananda (first of the 12 basic asanas), Iyengar, Ashtanga (finishing sequence) and many hatha classes.
Preparatory poses

Follow-up poses and transitions

Counterposes

Related poses

More inversion poses

Frequently asked questions

Is headstand safe for beginners?

Headstand is an advanced inversion. Beginners can prepare with dolphin pose and the tucked half headstand, ideally with a teacher, and should skip it entirely with high or low blood pressure, glaucoma, eye surgery or neck injury.

How long should I stay in headstand?

Start short: about 10 seconds (Yoga Journal) or even 5 (Sivananda), adding a few seconds at a time. A steady 20 seconds is better than a long hold that sinks into the neck.

Should headstand come before or after shoulderstand?

Schools differ. The Sivananda sequence puts headstand first; Ashtanga’s finishing sequence does shoulderstand first. Follow your teacher’s order.

What is the difference between supported and tripod headstand?

In supported headstand the forearms and interlaced hands form the base. In tripod headstand the palms are on the floor and form a triangle with the head.

Sources

  1. Supported Headstand: How to Practice Salamba Sirsasana, Yoga Journal (accessed October 6, 2026)
  2. Headstand, Sivananda Ashram Yoga Ranch (Sivananda Yoga Vedanta Centres) (accessed October 6, 2026)
  3. Yoga in Daily Life (Swami Sivananda): Sirshasana, The Divine Life Society (accessed October 6, 2026)
  4. Śirṣāsana A: Kopfstand (Headstand), AshtangaYoga.info (Dr. Ronald Steiner) (accessed October 6, 2026)
  5. Śirṣāsana B: Kopfstand (legs horizontal), AshtangaYoga.info (Dr. Ronald Steiner) (accessed October 6, 2026)
  6. Nāḍi Śodhana: second series pose list (Mukta Hasta and Baddha Hasta Śirṣāsana), AshtangaYoga.info (accessed October 6, 2026)
  7. I8 Teaching Syllabi (asanas with Light on Yoga plate numbers), Iyengar Yoga (UK) (accessed October 6, 2026)

Facts checked on October 6, 2026