One-Legged King Pigeon Pose (Eka Pada Rajakapotasana I-IV): the full backbend and its variations

One-legged king pigeon (Eka Pada Rajakapotasana) is the full pigeon: front leg folded, back foot held overhead and drawn to the head. How to build it in stages, versions I to IV, precautions and preparation.

Not yet reviewed by a qualified teacher Names and shape checked against 6 sources

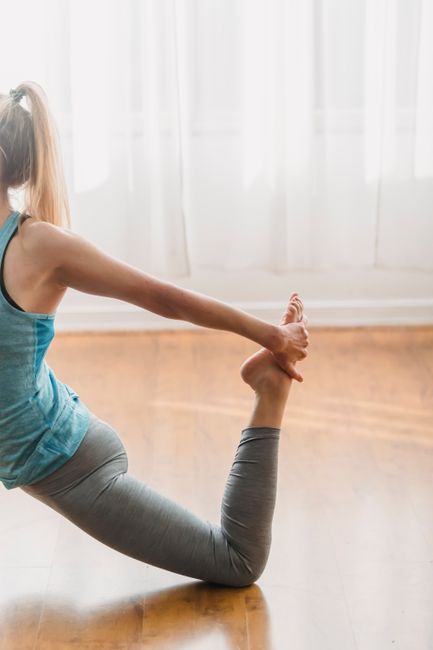
Side view of crop fit anonymous female doing yoga in One Legged King Pigeon pose ll in daylight
Sanskrit name
Eka Pāda Rājakapotāsana एक पाद राजकपोतासन (source)
Pronunciation
aa-KAH pah-DAH rah-JAH-cop-poh-TAHS-anna (source)
Also called
King Pigeon, One-Footed King Pigeon
Other spellings
Eka Pada Rajakapotasana, Eka Pada Raja Kapotasana, Eka Pada Rajakapotasana I, Eka Pada Rajakapotasana II, Eka Pada Rajakapotasana III, Eka Pada Rajakapotasana IV
Pose family
Backbend, Hip opener and leg extension
Starting position
Kneeling
Movement
Backbend, Hip external rotation
Taught in
Vinyasa Yoga: Flow, Breath and What to Expect
Difficulty
Advanced
Prerequisite skills
Comfortable pigeon pose without knee pain; camel and bow pose with ease; shoulders that take the arms overhead and back without strain.
Body areas
Chest, Hips, Legs, Shoulders, Spine
Props
Blanket, Block, Strap, Wall
Practised
Solo

Names in different traditions

TraditionName usedNote
Iyengar (Light on Yoga)Eka Pāda Rājakapotāsana I-IVAsanas 184 and 186-188, plates 539-547: I from staff with the front heel at the groin (plate 539 is the upright preparatory stage); II front foot standing; III front leg in Virasana; IV from Hanumanasana.
Yoga JournalOne-Legged King Pigeon Pose (I) and IIMain pose page teaches the pigeon preparation under this name; challenge-pose article and the II page teach the foot-to-head forms.
Ashtanga (AshtangaYoga.info, third series)Eka Pāda Rāja KapotāsanaListed in the third series (Sthira Bhaga).

Step by step

Coming into the pose

  1. Warm up the hips, thighs, spine and shoulders. Come into pigeon pose with the right shin forward and the right heel near the left groin; left leg straight back, front of the thigh on the floor.
  2. Hands on the waist, lift and push the chest forward, lengthen the neck and take the head back a little: the preparatory stage. Stay a few breaths.
  3. Hands on the floor, bend the left knee and lift the shin toward vertical. Catch the left foot with the left hand (or a strap), elbow bending and turning to point up.

In the pose

  1. On an exhale take the right arm overhead and hold the foot with both hands; lift the chest and, if it comes easily, rest the head against the sole. Stay about 10 seconds, breathing as smoothly as you can (Light on Yoga).

Coming out

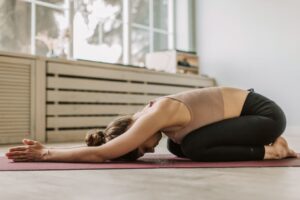
  1. Release the hands one at a time, lower the back leg and come back to pigeon, then to hands and knees. Repeat on the other side for the same time.

Breathing

Exhale as each arm reaches back for the foot. In the full pose the chest is fully expanded and the abdomen drawn in, so breathing tends to be quick; Light on Yoga asks you to try to breathe normally. Come out if you begin to hold the breath or strain.

Alignment cues

  • Set the legs as in pigeon first: front hip supported, back leg straight back.
  • Lift the chest forward and up before bending the back knee.
  • Back shin close to vertical; tighten the back thigh to bring the foot toward the head.
  • Elbows point up and stay narrow; the arm rotates overhead rather than being pulled straight back.
  • Bend from the upper back; keep the lower back long.

Common alignment errors

  • Grabbing the foot with a straight arm and twisting the shoulder.
  • Collapsing into the lower back instead of lifting the chest.
  • Letting the front hip hang so the weight falls onto the front knee.
  • Throwing the head back before the chest has lifted.

Modifications and easier variations

  • Upright pigeon with hands on the waist and the back leg straight (the preparatory stage). none

Advanced variations

  • Version II: front foot standing, back knee down, foot to head (section on this page).
  • Version III: front leg folded as in hero pose (section on this page).
  • Version IV: from the full split (section on this page).

Props and chair adaptations

  • Strap looped around the back foot, held with both hands overhead. strap
  • Blanket or block under the front hip to keep the pelvis level. blanket
  • Back shin against a wall in a kneeling lunge to open the front of the thigh (Yoga Journal suggestion for version II). wall
  • Seated on the side of a chair, one leg forward and the other knee bent down and back, holding the back foot with the same-side hand for a quad stretch. chair

Precautions

  • Lower-back, sacroiliac, knee, shoulder or neck injury: avoid.
  • High blood pressure or heart conditions: only with a health professional's clearance.
  • Front-knee pain: come out and return to supported pigeon or reclining figure four.
  • Pregnancy: not recommended.

Learn it with a teacher: An advanced backbend. Learn it with an experienced teacher, in stages, after pigeon, camel and bow are comfortable. Versions III and IV need a teacher even for experienced practitioners.

General information, not medical advice. Poses do not cure illness. If you are pregnant, injured or have a health condition, check with your doctor and tell your teacher before you practise.

In short: one-legged king pigeon, Eka Pada Rajakapotasana, is the full version of the pigeon shape: the front leg folds on the floor, the back knee bends, and both hands reach overhead to hold the back foot while the chest lifts and the head drops back toward it. It is a deep backbend combined with a deep hip opener, an advanced pose to learn with a teacher after the simpler pigeon pose is comfortable.

Most people know only the first half of this pose. The pigeon taught in most classes, front leg folded and back leg straight, is what B.K.S. Iyengar calls the preparatory movement of One-Legged King Pigeon I. The full pose adds the back foot drawn up to the head, which needs open hip flexors and thighs, a flexible upper back and shoulders that can rotate the arms overhead. Light on Yoga then describes three more variations, II to IV, which change what the legs do. All four are on this page.

The name

Eka means one, pāda foot or leg, rāja king and kapota pigeon or dove. Light on Yoga explains that the chest is pushed forward like that of a pouter pigeon, which gives the pose its name. The numbering I to IV used here is Iyengar’s; Yoga Journal uses the same name and numbering for versions I and II. In the Ashtanga system, the pose appears in the third (advanced A) series as documented by AshtangaYoga.info. Do not confuse it with Kapotasana, the kneeling pigeon backbend in which both hands hold the heels, or with Rajakapotasana, the king pigeon done lying on the belly with both feet drawn to the head.

How to make it work

Build the pose in stages. First set the legs as in pigeon, front heel near the groin, back leg straight, and lift the chest with the hands on the waist; this upright stage is already a backbend. Then bend the back knee and catch the back foot with the hand on the same side, or with a strap looped around the foot. Yoga Journal’s challenge-pose sequence suggests the strap, and taking the arm back with a bent elbow, turning it up and over so the elbow points to the ceiling, rather than yanking a straight arm behind you. Only when one hand holds the foot comfortably does the second arm join, and only then does the head move back toward the sole. The lift comes from the chest and upper back; if the lower back pinches, you are bending from the wrong place.

Precautions in plain words

This is an advanced backbend. Avoid it with lower-back, sacroiliac, knee, shoulder or neck injuries, and with high blood pressure or heart problems unless a health professional has cleared you. The front knee carries the same risk as in pigeon: stop at any knee pain. Light on Yoga notes that the breathing becomes fast in the full pose because the chest is fully expanded; try to keep it smooth and come out if you start to strain or feel dizzy. Not recommended in pregnancy. Learn it with an experienced teacher. This page is general information, not individual advice.
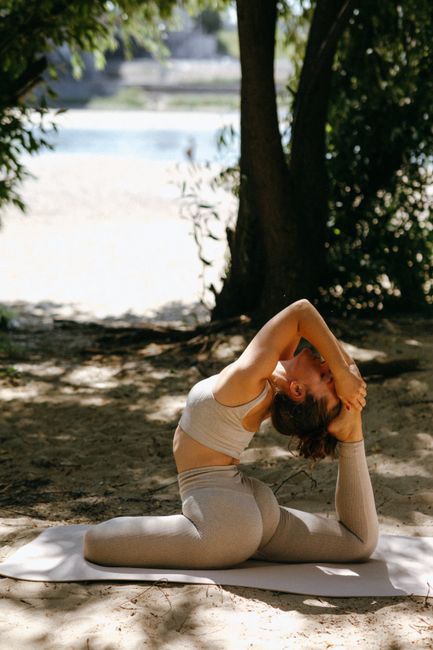
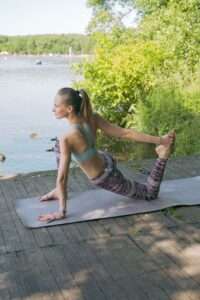
Woman practicing yoga one-legged pigeon pose outdoors in sunny forest.

One-Legged King Pigeon II (Eka Pada Rajakapotasana II)

In version II the front foot stands flat on the floor, shin roughly vertical as in a lunge, while the back knee rests on the floor; the back shin lifts, both hands reach overhead to hold the back foot and the head rests against it. Light on Yoga describes the front leg as in Marichyasana I with the front knee pushed forward, and holds for about 15 seconds; Yoga Journal gives the same shape with 15 to 30 seconds and suggests a strap and practising with the back shin against a wall. Iyengar notes that once the balance is found it is easier than version I. Advanced.

One-Legged King Pigeon III (Eka Pada Rajakapotasana III)

In version III the front leg is folded back beside the hip as in hero pose, toes pointing back, while the other leg stretches straight behind; that back knee then bends and both hands take the foot to the head, held for about 15 seconds in Light on Yoga. The hero-pose leg makes this a strong knee position as well as a deep backbend; only practise it if hero pose is easy for you. Advanced. This version is documented in Light on Yoga; we have not yet found a second independent description.

One-Legged King Pigeon IV (Eka Pada Rajakapotasana IV)

Version IV starts from the full front split, monkey pose: from the split, the back knee bends, the foot is lifted toward the head and caught with both hands overhead, for about 10 seconds in Light on Yoga, which rates it among the hardest of the series. It requires a comfortable split on both sides plus a deep backbend. Very advanced; learn it only with a teacher. Like version III, it is documented here from Light on Yoga alone.

Preparation, counterposes and where it is taught

Prepare with pigeon pose, low lunge with the back knee bent, camel pose, bow pose and reclining hero pose. Afterward, neutralise the spine gently: child’s pose, a simple twist such as reclining spinal twist and downward-facing dog. The pose belongs to advanced Iyengar and Ashtanga practice and to backbend workshops in vinyasa; our wheel pose preparation plan builds many of the same openings.
Preparatory poses

Follow-up poses and transitions

Counterposes

Related poses

More backbend poses

Frequently asked questions

Is pigeon pose the same as one-legged king pigeon?

The pigeon most classes teach is the preparatory stage of one-legged king pigeon. The full pose adds the back foot held overhead and drawn to the head, a deep backbend.

What are the four versions of one-legged king pigeon?

In Light on Yoga: I from the pigeon leg position, II with the front foot standing, III with the front leg folded as in hero pose, and IV from the full front split. All take the back foot to the head.

How do I reach my back foot?

Use a strap looped around the foot, take one arm at a time with the elbow bending up and over, and lift the chest before bringing the head back.

Is one-legged king pigeon the same as Kapotasana?

No. Kapotasana is a kneeling backbend with the hands holding the heels; one-legged king pigeon has one leg folded forward and one foot drawn to the head.

Sources

  1. B.K.S. Iyengar, Light on Yoga (1966), asanas 184 and 186-188, Eka Pada Rajakapotasana I-IV, plates 539-547, Allen & Unwin (Internet Archive record) (accessed October 6, 2026)
  2. Challenge Pose: Eka Pada Raja Kapotasana (Kathryn Budig), Yoga Journal (accessed October 6, 2026)
  3. One-Legged King Pigeon Pose II (Eka Pada Rajakapotasana II), Yoga Journal (accessed October 6, 2026)
  4. One-Legged King Pigeon Pose: How to Practice Eka Pada Rajakapotasana, Yoga Journal (accessed October 6, 2026)
  5. 3rd Series (Sthira Bhaga) posture list, AshtangaYoga.info (accessed October 6, 2026)
  6. Monier-Williams Sanskrit-English Dictionary: eka, pāda, rājan, kapota, Cologne Digital Sanskrit Dictionaries, University of Cologne (accessed October 6, 2026)

Facts checked on October 6, 2026