Monkey Pose (Hanumanasana): the full front split, props and preparation

Monkey pose (Hanumanasana) is the full front split, front leg forward and back leg straight back with the pelvis square. How to work toward it with blocks and a bolster, what to avoid, and where it is taught.

Not yet reviewed by a qualified teacher Names and shape checked against 5 sources

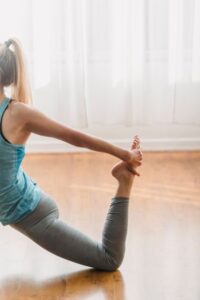
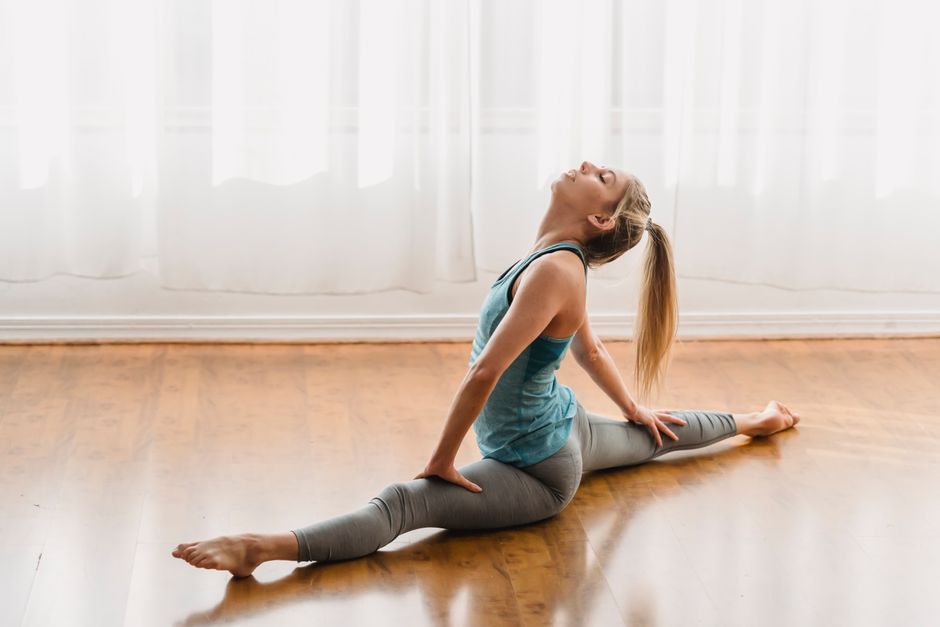
Full body of slim female in sportswear practicing yoga exercises in front split while training in light room on wooden floor
Sanskrit name
Hanumānāsana हनुमानासन (source)
Also called
Monkey Pose, Front Splits, Full Split, Splits
Other spellings
Hanumanasana
Pose family
Hip opener and leg extension
Starting position
Seated
Movement
Forward fold
Taught in
Vinyasa Yoga: Flow, Breath and What to Expect, Hatha Yoga: The Historical Term and the Modern Class
Difficulty
Advanced
Prerequisite skills
Comfortable low lunge and half split on both sides; hamstrings and hip flexors warmed up; the ability to hold the pelvis square without pain.
Body areas
Hamstrings, Hips, Legs
Props
Blanket, Block, Bolster
Practised
Solo

Names in different traditions

TraditionName usedNote
Iyengar (Light on Yoga)HanumānāsanaAsana 169, plates 475-476a: kneel, slide the legs apart until the back of the front leg and the front of the back leg rest on the floor; palms joined in front of the chest; 10 to 30 seconds each side. Compared there to the splits of Western ballet.
Ashtanga (AshtangaYoga.info, third series)HanumānāsanaAdvanced A series: split, then fold forward over the front leg, five breaths each side.
Bihar School of YogaHanumanasana (the monkey god pose)Asana Pranayama Mudra Bandha, advanced group.

Step by step

Coming into the pose

  1. Warm up well. From downward-facing dog, step the right foot between the hands and lower the left knee; place a block on each side of the front foot and a bolster or blocks within reach.
  2. Shift the hips back over the left knee and straighten the right leg (half split). Square the hips: draw the right hip back and the left hip forward.
  3. Slide the right heel forward and, as the legs open, slide the left knee back, lowering the pelvis slowly. Place the bolster lengthwise or blocks under the pelvis or the right hip as soon as you need support.

In the pose

  1. The back of the front leg and the front of the back thigh face the floor; the back leg does not roll outward. Keep the pelvis square to the front and the spine upright, hands on blocks or, when steady, joined in front of the chest.
  2. Breathe slowly for about 5 to 10 breaths (Light on Yoga suggests 10 to 30 seconds in the full pose).

Coming out

  1. Press the hands into the blocks, bend the front knee and draw the front leg back to return to a lunge or downward-facing dog. Repeat with the left leg forward.

Breathing

Breathe slowly and evenly through the nose; Light on Yoga asks for normal breathing. Use each exhale to soften a little; if you hold your breath, you have gone too far.

Alignment cues

  • Pelvis square to the front of the mat; do not let it turn open to the side.
  • Back leg neutral: kneecap and thigh face the floor, inner thigh lifts.
  • Front foot flexed or pointed, kneecap facing the ceiling.
  • Support under the pelvis before the legs run out of control.
  • Spine long and upright; lift through the chest rather than collapsing forward.

Common alignment errors

  • Turning the pelvis sideways to get lower, which moves the stretch to the inner thigh and inner knee.
  • Rolling the back leg out so the knee faces sideways.
  • Dropping into the split without props or warm-up.
  • Locking or hyperextending the front knee.
  • Holding the breath and pushing through sharp sensation at the back of the thigh.

Modifications and easier variations

  • Stay in half split, or in low lunge, until those are comfortable on both sides. none

Advanced variations

Props and chair adaptations

  • Bolster lengthwise under the pelvis, plus a folded blanket if needed, so the pelvis rests while the legs work. bolster
  • One or two blocks under the front-leg hip or under the hands. block
  • On a bare floor, a folded blanket under the back knee and front heel lets the legs slide gradually. blanket
  • Chair hamstring stretch: sit at the front of a chair, extend one leg with the heel down and hinge forward with a long spine. chair

Precautions

  • Hamstring tear or strain, groin strain, hip labrum problems or knee injury: avoid or practise only under qualified guidance.
  • Never attempt it cold; warm up the hamstrings and hip flexors first.
  • Very mobile joints: work with muscular support and props rather than sinking into the joints.
  • Pregnancy: do not work toward new depth; supported versions only, with your health care provider's agreement.

Learn it with a teacher: An advanced pose. Learn it with a teacher who can check that the pelvis stays square and suggest props; progress over months, not in one class.

General information, not medical advice. Poses do not cure illness. If you are pregnant, injured or have a health condition, check with your doctor and tell your teacher before you practise.

In short: monkey pose, Hanumanasana, is the full front split: one leg stretched straight forward, the other straight back, the pelvis facing the front of the mat and lowered toward the floor. It asks for long hamstrings in the front leg and long hip flexors in the back leg, so for most people it is a pose to work toward over months, sitting on blocks or a bolster on the way.

Monkey pose looks like the splits of ballet or gymnastics, and B.K.S. Iyengar makes the same comparison in Light on Yoga. What makes the yoga version different is the attention to how you get there: hips square, both legs neutral, the spine long, and props under the pelvis for as long as you need them. Approached that way, the progress is slow but steady. Forced, it is one of the easier ways to strain a hamstring.

The name and the story behind it

Hanumānāsana is named after Hanumān, the monkey hero of the Rāmāyaṇa. In the story he crosses the sea to Laṅkā in one great leap to find Sītā, and later leaps to the Himalayas to fetch a healing herb; Light on Yoga says the pose commemorates those leaps. The same Sanskrit name, and the same shape, appear in Light on Yoga (1966), in the Bihar School’s Asana Pranayama Mudra Bandha and in the third (advanced A) series of Ashtanga yoga as documented by AshtangaYoga.info, where the pose is followed by a forward fold over the front leg. In English it is usually called monkey pose or the front split. The half version, with the back knee down and the front leg straight, has its own page: half split.

Making the split work

The two legs do opposite jobs. The front leg flexes at the hip, so the hamstrings and the back of the knee lengthen; the back leg extends, so the front of that hip, the hip flexors and the front of the thigh, lengthen. AshtangaYoga.info points out that the back leg is usually the real limit, and warns against the common shortcut of turning the pelvis open to the side: the split then gets lower, but the stretch moves to the inner thigh and the inner knee, and the hip flexors that the pose is meant to open are left out. Yoga Journal gives the same priority: keep the pelvis square and the back thigh from rolling outward.

That is why props matter more here than in most poses. A thick bolster placed lengthwise under the pelvis, or one or two blocks under the front-leg hip, lifts the floor to meet you, so you can keep the hips square and still feel the full stretch. Blocks under the hands let you keep the spine upright. Many teachers also suggest practising on a bare floor with a folded blanket under the back knee and the front heel, so the legs can slide gradually; on a sticky mat they tend to stop dead. Lower only while the breath stays slow, and come out if the sensation turns sharp or sits in the back of the knee.

Precautions in plain words

Monkey pose is an advanced stretch. It is not suitable with a recent or recurring hamstring tear, groin strain, hip labrum problems or a knee injury, and people with very mobile joints should take care not to sink into the joints rather than using the muscles. Warm up thoroughly first: a split attempted cold is the classic way to pull a hamstring. In pregnancy, do not work toward new depth; keep to supported versions and follow your health care provider’s advice. If you have any hip, knee or back condition, check with a doctor or physical therapist first. This page is general information, not individual advice.

Preparation and what comes next

The usual path runs through low lunge for the back-leg hip flexors, half split for the front-leg hamstrings, pyramid pose and reclining hand-to-big-toe pose. Afterward, rest in child’s pose or fold forward in seated forward bend. Once the split is comfortable, it becomes the base of deeper poses: in Light on Yoga the fourth variation of one-legged king pigeon is done from the split, with the back foot drawn up to the head. The side-to-side split, Samakonasana, is a different pose that Light on Yoga rates as harder still.

Where it is taught

You will meet monkey pose in Iyengar classes, in the advanced series of Ashtanga, and as a peak pose in vinyasa workshops, usually after a long warm-up. Our yoga for flexibility plan builds the lunges and forward bends it depends on. Browse more hip and leg stretches in the pose library.
Preparatory poses

Follow-up poses and transitions

Counterposes

Related poses

More hip opener and leg extension poses

Frequently asked questions

Is monkey pose the same as the splits?

It is the front split. In yoga the pelvis is kept square to the front and the back leg neutral, and props under the pelvis are normal while you work toward it.

How long does it take to learn the splits?

It depends on your starting point; for most adults it is months or years of regular practice. Use half split and low lunge on both sides and never force the last part.

Why is it called Hanumanasana?

It is named after Hanuman, the monkey hero of the Ramayana, whose great leap across the sea to Lanka the pose is said to recall.

What props help with monkey pose?

A bolster lengthwise under the pelvis, blocks under the front hip or hands, and on a bare floor a blanket under the back knee and front heel so the legs slide gradually.

Sources

  1. B.K.S. Iyengar, Light on Yoga (1966), asana 169 Hanumanasana, plates 475-476a, Allen & Unwin (Internet Archive record) (accessed October 6, 2026)
  2. Hanumānāsana: Hanumān's Split, AshtangaYoga.info (accessed October 6, 2026)
  3. Monkey Pose (Hanumanasana), Yoga Journal (accessed October 6, 2026)
  4. Two Fit Moms: 8 Poses to Prep You for Hanumanasana, Yoga Journal (accessed October 6, 2026)
  5. Swami Satyananda Saraswati, Asana Pranayama Mudra Bandha: Hanumanasana (the monkey god pose), Bihar School of Yoga (Internet Archive) (accessed October 6, 2026)

Facts checked on October 6, 2026