Head-to-Knee Pose (Janu Sirsasana): steps, props and versions A–C

Head-to-knee pose (Janu Sirsasana) is a one-legged seated forward bend: one leg straight, the other bent out to the side. Ashtanga teaches three versions, A, B and C.

Not yet reviewed by a qualified teacher Names and shape checked against 5 sources

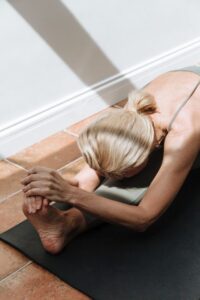
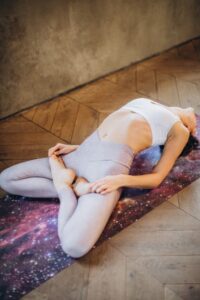
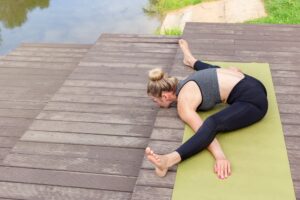
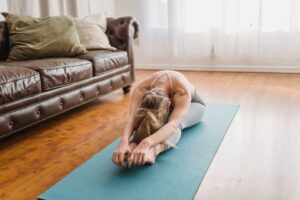
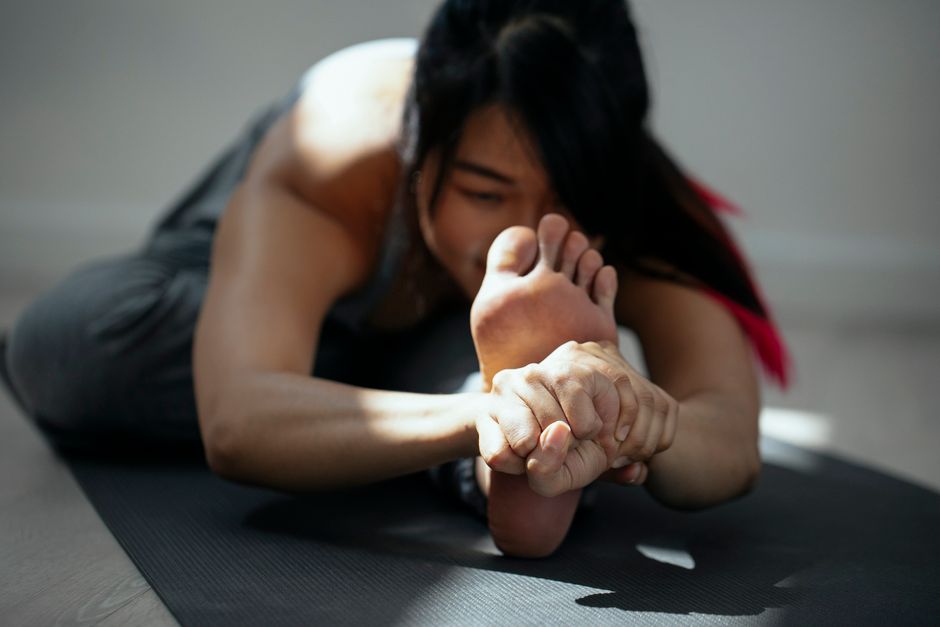
Crop young flexible Asian female bending forward while practicing Head to Knee I asana on mat during yoga session
Sanskrit name
Jānu Śīrṣāsana जानु शीर्षासन (source)
Also called
Head to Knee Forward Bend, Head and Knee Pose
Other spellings
Janu Sirsasana, Janu Shirshasana, Janusirsasana, Janu Sirsasana A, Janu Sirsasana B, Janu Sirsasana C
Pose family
Forward bend, Hip opener and leg extension, Seated
Starting position
Seated
Movement
Forward fold, Hip external rotation
Taught in
Hatha Yoga: The Historical Term and the Modern Class, Vinyasa Yoga: Flow, Breath and What to Expect
Difficulty
Beginner
Prerequisite skills
Sitting on the floor with one leg straight; some outward rotation at the hip of the bent leg. Props make it accessible to beginners.
Body areas
Hamstrings, Hips, Spine
Props
Blanket, Block, Bolster, Chair, Mat, Strap
Practised
Solo

Names in different traditions

TraditionName usedNote
Ashtanga vinyasa (Pattabhi Jois lineage)Jānu Śīrṣāsana A, B and CThree versions in the primary series that differ in the placement of the bent-leg foot; five breaths each side, right first (AshtangaYoga.info, Ronald Steiner).
Iyengar / general modern usageJanu Sirsasana (Head-to-Knee Forward Bend)One version, equivalent to Ashtanga A (Yoga Journal pose library).

Step by step

Coming into the pose

  1. Sit in staff pose, on a folded blanket if the lower back rounds.
  2. Bend the right knee out to the side and place the sole of the right foot against the inner left thigh, as high as is comfortable. Let the right thigh relax outward; support the knee with a block if it floats.
  3. Turn the torso slightly so the breastbone lines up over the straight left leg. Inhale and lengthen the spine, arms up or hands on the leg.

In the pose

  1. Exhale and hinge forward from the hips over the left leg. Hold the foot, the shin or a strap; in Ashtanga the left hand holds the right wrist beyond the foot.
  2. Keep the left kneecap and toes pointing up and the thigh firm. Lengthen on each inhale, fold a little further on each exhale, elbows bending outward.
  3. Stay for five breaths (Ashtanga) or up to a minute or more in slower classes.

Coming out

  1. Inhale and come up with a long spine, release the bent leg, straighten both legs and repeat on the other side.

Breathing

Inhale to lengthen the spine, exhale to fold. Breathe slowly through the nose and let the exhalation guide the fold; Ashtanga counts five breaths on each side.

Alignment cues

  • Let the bent-leg thigh relax outward from the hip; do not twist the knee to get the foot in place.
  • Line the breastbone up over the straight leg before folding.
  • Hinge from the hips; sit on a blanket if the pelvis tips backward.
  • Keep the straight leg active, kneecap up, without locking the knee.
  • Draw the shoulders away from the ears as you fold.

Common alignment errors

  • Pulling the body down with the arms so the back rounds and the chest collapses.
  • Leaning back with the lower back instead of tilting the pelvis forward.
  • Forcing the bent knee down or letting it turn inward under pressure.
  • Opening the bent knee too wide when the inner thigh or knee is uncomfortable.

Modifications and easier variations

  • Bend the straight leg slightly and fold only as far as the spine stays long; or rest the forehead on a bolster across the straight leg. bolster

Advanced variations

Props and chair adaptations

  • Sit on a folded blanket, bolster or block so you can hinge from the hips. blanket
  • Loop a strap around the foot of the straight leg and hold it with straight arms. strap
  • Place a block or folded blanket under the bent knee if it does not rest on the floor, and a rolled blanket under the straight knee if it tends to lock. block
  • Chair version: sit near the front edge of a chair, extend one leg with the heel on the floor, rest the other foot flat, and hinge forward over the straight leg with the hands on the thigh or shin. chair

Precautions

  • Pain on the inside of the bent knee: support the thigh, narrow the angle or come out of the pose.
  • Knee injuries: avoid versions B and C; practise A with the bent knee supported, or keep both legs straight.
  • Lower-back problems, sciatica or hamstring injuries: check with your doctor first; keep the spine long and the straight leg slightly bent.

Learn it with a teacher: Version A with props can be learned alone. Learn versions B and C with an experienced teacher, especially C, which places strong demands on the knee.

General information, not medical advice. Poses do not cure illness. If you are pregnant, injured or have a health condition, check with your doctor and tell your teacher before you practise.

The yin yoga version

Yin yoga version: Half Butterfly (Yin Yoga): one leg long, a quiet fold

Half butterfly is the yin version of this shape: the same legs, the muscles relaxed and the spine allowed to round, held for three to five minutes (Yoga Journal; see the yin page for its yin sources). Head-to-knee pose is usually practised actively with a long spine.

In short: head-to-knee pose is a one-legged seated forward bend. One leg stays straight, the other knee bends out to the side with the sole of the foot against the inner thigh, and you fold over the straight leg. It stretches the hamstrings and back of the straight leg and opens the hip of the bent one. Because you work one side at a time, it is often easier than folding over both legs.

The pose is taught in most schools: Iyengar, Ashtanga (where it comes in three versions, A, B and C), hatha and vinyasa classes. Below we explain the name, the cues behind the steps, the knee precautions and the three Ashtanga versions, each in its own section.

What the name means

The Sanskrit name is Jānu Śīrṣāsana (often written Janu Sirsasana or Janu Shirshasana): jānu means knee, śīrṣa means head and āsana means seat or posture. “Head to knee” describes the idea more than the goal; in practice you reach the chest along the thigh, and the head arrives near the shin only when the hips and hamstrings allow it. It is a 20th-century posture as far as the written record shows: it is described in Krishnamacharya’s teaching and by his pupils B.K.S. Iyengar and Pattabhi Jois, not in the medieval hatha texts. Do not confuse it with revolved head-to-knee pose, which uses the same legs but is mainly a side bend.

Making the pose work

The bent leg does most of the hidden work. Its thigh rotates outward at the hip, much as the front leg does in warrior II. Let that thigh relax outward and down; if the knee floats high, put a block or folded blanket under it. If the inner knee complains, bring the bent knee a little closer to the straight leg: Yoga Journal notes that a wide angle can strain the inner thigh, and AshtangaYoga.info warns that forcing the fold while the bent thigh turns inward can press on the inner meniscus of the knee.

Turn the torso slightly so the breastbone lines up over the straight leg, sit on a folded blanket if the lower back rounds, and hinge from the hips. Keep the straight leg active with the kneecap pointing up and, if the knee tends to lock, a rolled blanket under it. Inhale to lengthen, exhale to fold a little further, and never pull yourself down with the arms. Ashtanga holds each side for five breaths; in slower classes you may stay for a minute or longer on each side.

Precautions in plain words

Watch the bent knee. Pain on the inside of the knee is a signal to support the thigh, narrow the angle or straighten the leg out of the pose. Lower-back problems, sciatica and hamstring injuries call for the same care as any forward fold: bent straight leg, long spine, no pulling. If you have a knee, hip or back condition, ask your doctor or physiotherapist before practising. This page is general information, not individual advice.

Preparation and what comes next

Downward-facing dog, bound angle pose and reclining hand-to-big-toe pose prepare the hamstrings and hips. Afterwards, open the front of the body with upward plank or fish pose, or rest in hero pose. From here, seated forward bend works both legs at once, and revolved head-to-knee adds a side bend. The yin version of this shape is half butterfly, held for several minutes with the muscles soft.

Head-to-Knee Pose A (Janu Sirsasana A)

Version A is the shape described above and the one most classes teach. In the Ashtanga primary series the sole of the bent leg rests as high as possible on the inner thigh of the straight leg, the bent thigh relaxes outward, and the hand on the straight-leg side holds the opposite wrist beyond the foot. You fold on an exhalation and stay for five breaths, then repeat on the other side, right side first. Level: beginner with props.

Head-to-Knee Pose B (Janu Sirsasana B)

In version B the foot of the bent leg keeps the same placement, but you lift the hips and sit with the perineum on the heel, the outer edge of the foot on the floor and the toes pointing forward under the straight thigh. You then fold as in A for five breaths. AshtangaYoga.info points out that sliding the foot under the thigh with the top of the foot flat is easier but is a different pose. Sitting on the heel loads the ankle and knee, so treat B as an intermediate variation and come out if the ankle or knee hurts.

Head-to-Knee Pose C (Janu Sirsasana C)

In version C the toes of the bent leg are turned under: the ball of the foot is on the floor, the heel lifts toward the groin and the foot is held between the two thighs, with the bent knee angled forward at about 45 degrees and drifting toward the floor over time. It asks a lot of the knee and ankle and is an advanced variation. Learn it with an experienced teacher, never force the knee down, and skip it if you have any knee injury.

You will meet head-to-knee pose in hatha, Iyengar, Ashtanga and vinyasa classes, usually in the seated, slower part of the practice.
Preparatory poses

Follow-up poses and transitions

Counterposes

Related poses

More forward bend poses

Frequently asked questions

What is head-to-knee pose in Sanskrit?

Jānu Śīrṣāsana, usually written Janu Sirsasana: jānu means knee and śīrṣa means head.

What is the difference between Janu Sirsasana A, B and C?

They differ in the bent leg. In A the sole rests against the inner thigh; in B you sit on the heel of the bent leg; in C the toes are turned under and the heel lifts toward the groin. All three are in the Ashtanga primary series.

Why does my knee hurt in head-to-knee pose?

Usually because the hip cannot rotate far enough and the knee takes the strain. Support the bent thigh with a block, bring the knee closer to the straight leg, and come out if the pain stays.

Is head-to-knee pose easier than seated forward bend?

For many people, yes: working one leg at a time lets the pelvis tilt forward more easily. It still needs a long spine and no pulling.

Sources

  1. Head-to-Knee Forward Bend (Janu Sirsasana), Yoga Journal (accessed October 6, 2026)
  2. Jānu Śīrṣāsana A: Head and Knee Pose, AshtangaYoga.info (Dr. Ronald Steiner) (accessed October 6, 2026)
  3. Jānu Śīrṣāsana B: Head and Knee Pose, AshtangaYoga.info (Dr. Ronald Steiner) (accessed October 6, 2026)
  4. Jānu Śīrṣāsana C: Head and Knee Pose, AshtangaYoga.info (Dr. Ronald Steiner) (accessed October 6, 2026)
  5. Paschimottanasana (section on Janusirsasana origins; pointer only), Wikipedia (accessed October 6, 2026)

Facts checked on October 6, 2026